Import territories from a file
This article demonstrates how to visualize territories by importing a territory assignments file.
Territory hierarchy visualization, easy territory map sharing, and territory optimization using geographic factors such as drivetime and connectivity are the main reasons people manage their territories in mapping software like MapBusinessOnline.
In MapBusinessOnline you can build territories from various alignment layers including ZIP codes, counties, states, Census tracts, and MSA. If you want to design your territories by selecting territory units on the map or in the Data window, follow the steps presented in the following article: Manually create territories one-by-one. If have your territories already designed in a CRM or salesforce management system, follow the steps below to visualize the territories in MapBusinessOnline.
Note: in the article we will present steps required to build territories from USPS 5-digit ZIP codes. Building territories from other alignment layers is similar.
Preparation Steps
- Do you allow your territories to intersect? Let's make the decision now and adjust the territory intersection option as follows.
- Open the Manage map and data dialog. Click the Gear icon at the top of the main toolbar to open the dialog.
- In the dialog select the Territory options tab and change the intersection settings as desired.

- Make sure that ZIP code map layer is visible. Do that by checking visibility box in Map & Data window.

Import Your Territories
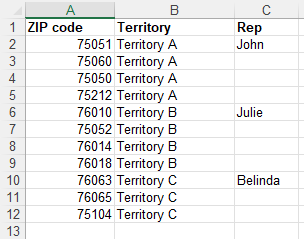
- Enter/copy territory assignments into an Excel or comma/tab delimited file. Each row in the file shall map a ZIP code to a territory like you can see on the picture below. The file may have additional columns with territory information like sale rep names.
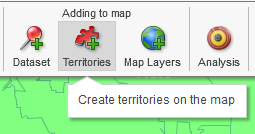
- Go to MapBusinessOnline app. Click the Territories button on the main toolbar to start the Create territories wizard.
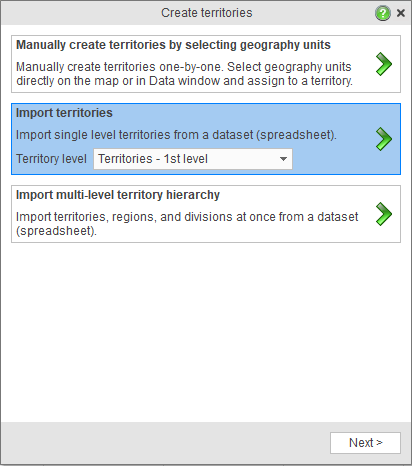
- On the first page choose the Import territories option. If you have a multi-level territory hierarchy, choose the respective option on the page.
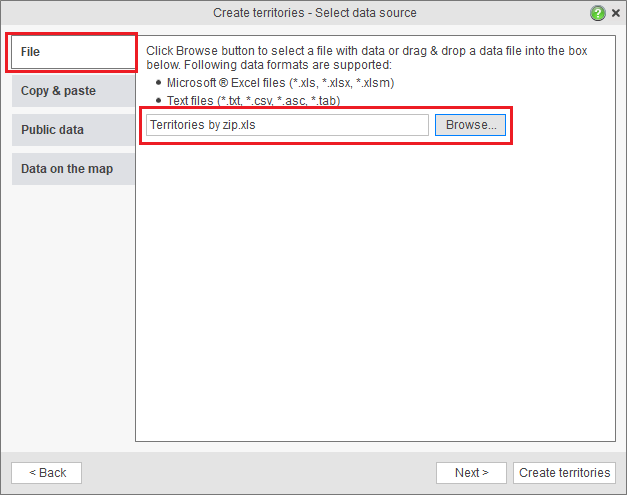
- On the Select data source page choose the File tab and select the file with the territory assignments. Click the Browse button to locate the file.
In the instructions we want to demonstrate all Create territories wizard options and therefore will click Next, but you can click the Create territories button and let MBO figure the rest.
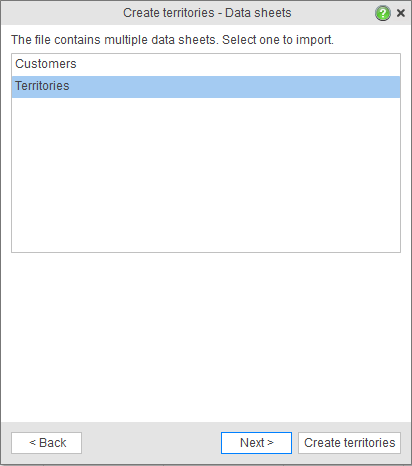
- If the territory file contains more than one data sheet, select the one with the territory assignments. Click Next.
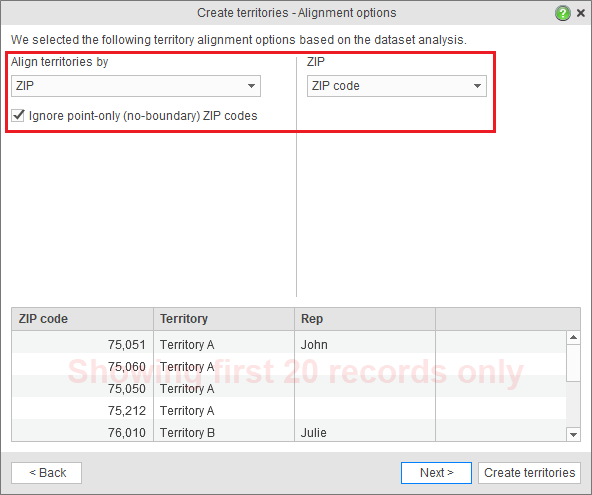
- The next page allows you to choose a territory alignment layer (ZIP in our case) and map required location columns. MapBusinessOnline analyzes the data you import and makes the choices for you automatically. Just check that the automatic selection is correct (it is in our case).
When creating territories by ZIP code you will have the Ignore point-only (no-boundary) ZIP codes option. The choice will instruct MapBusinessOnline to skip any ZIP code in your data that has no corresponding boundary (PO boxes, high-rises, etc.).
Click Next.
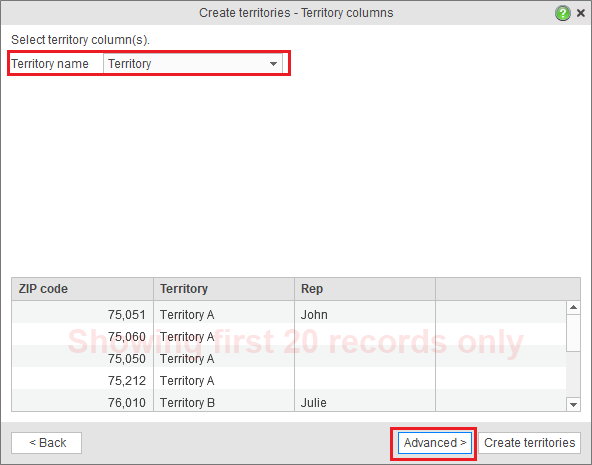
- MapBusinessOnline will choose a territory name column for you. Correct it if necessary. If you want to import territory columns in addition to the territory name, click Advanced button.
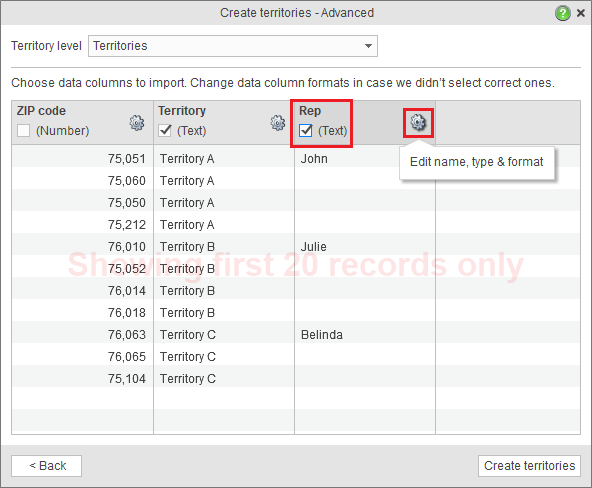
- Check the box in the column header to import the column. You can also modify name, type, and format of columns being imported. Click Create territories button.
- MapBusinessOnline will start importing the territories. At the end it will show a summary of territories processed. Click the Done button to finish territories importing.

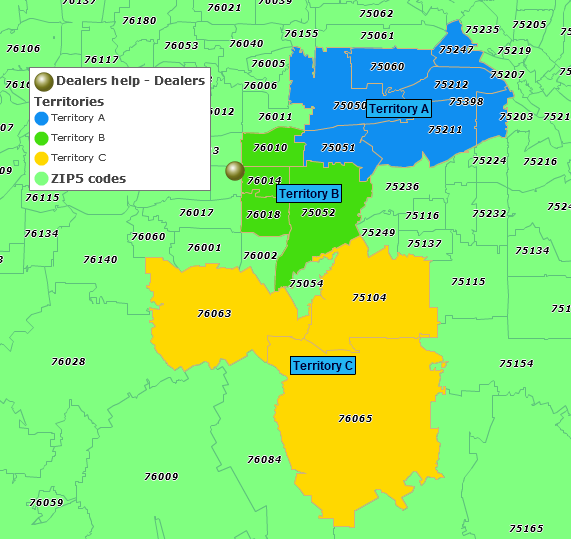
- The territories are on the map now!
Related articles
- Manually create territories one-by-one
- Change territory color, transparency & outline
- Customize territory labels – Learn how to total sales or demographic data in a territory and display the value in a territory label.
- Rename a territory and edit notes
- Delete a territory
- Hide geographies that are not part of any territory


