MapBusinessOnline newsletter – November 2020
MapBusinessOnline Webinar - Your First Business Map
Join us for a MapBusinessOnline Community Webinar focusing on new or returning users who would like some instruction around creating a basic business map.
We'll create a new map, import some location data, and talk about best practices.
Please register here for our 11:00 AM, December 10, 2020 Webinar
This basic business map review will include the following processes:
- Creating a basic business map
- Importing business locations data
- Symbolizing and color-coding imported data
- Creating Radius and ZIP code maps
- Creating a territory map
- Accessing demographic data
- Best map practices
We look forward to providing another instructional business mapping presentation. The webinar will include access to a recording of the presentation a few days after the event.
MapBusinessOnline 7.0 Released: Data Filtering, Update Improvement, Vector Map Background for Windows Users
Our Development Team has an on-going project to improve the MapBusinessOnline user experience. Last month we've released MapBusinessOnline 7.0 the first in a series of updates designed to enhance your day-to-day experience applying MapBusinessOnline.
The User Enhancements are focused on improved map background resolutions and better data filtering options.
MapBusinessOnline Windows users who update the application through the Map App Updater have an option in Map and Data to select the Vector Map background. Hover your cursor over the Street layer, click the Edit Gear, and try the Vector Map option. You should find:
- The map background is displayed more clearly, with sharper lines and colors
- Intermediate Map Zoom Levels now display a much clearer and sharper background image
- The large format PDF print option now offers 300 DPI resolution
The Filter Button is located on the Data Window Toolbar as a Funnel Icon. Click this to find:
- The map view filter checkbox in the filter section of the Data Window toolbar can be set by data content or geographic selection.
- Data Window data filtering now allows more than two conditions per column. Click the Filter Button on the Data Window toolbar and select a layer or dataset to filter. Note the option for adding a column is a green + sign
- Filtering now offers additional modifier operations to apply including: one of, not one of, contains one of, doesn’t contain one of
- A lookup function has been added to the filter option set of 'one of' modifiers (listed above). Click into any of the 'one of' modifiers to see the look up button in the modifier field
Census Data Update - The most recent MapBusinessOnline US Census Bureau section is marked 2018. Demographic Data options for the 2019 and 2020 years are third-party projections, as opposed to Census ACS Survey data.
This month we've also added Employee and Entity counts, as well as Payroll Information by Industry at County & State levels for years 2017 and 2018
Unique ID & Imported Data Updates – By inserting a Unique ID column into your imported data, you can achieve semi-automatic updates for your imported data, typically stored on your desktop or a shared from a network drive. Read more.
The most recent update enhances the data update process in MapBusinessOnline. Users can now update imported datasets without the need for a reimport. In Map and Data, click the Dropdown associated with data updates and simply select a column in your existing data to use as a Unique ID column. (Those numeric values must still be unique.)
When you add or edit columns in your stored datasets, make sure to not change the critical addressing and naming columns of the original dataset. Changing the location columns will break the update connectivity.
MapBusinessOnline Tips & Tricks
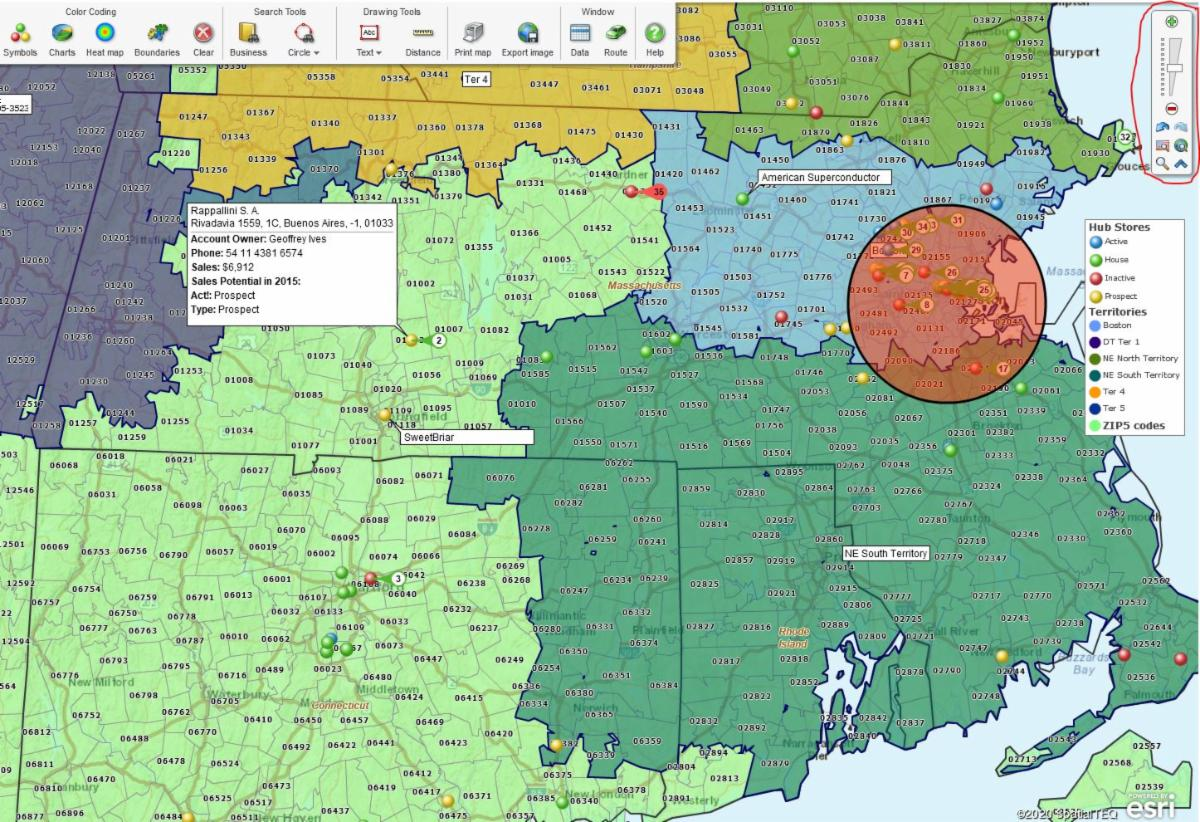
Zoom Options - MapBusinessOnline includes several options for zooming into the map. See them listed below in order of our preference:
- Magnifying Glass - In the scroll bar section at the upper right corner of the application, choose the Magnifying Glass icon in the lower right. Now your cursor shows the Magnifying Glass icon, choose a point on the map and hold down your mouse button as you pull to the right or left. You'll see the tool draw a rectangle around an area and zoom in. You'll need to unclick the zoom tool to continue with other mapping operations.
- Back & Forward Buttons - To zoom back out you can click the back button in the Scroll Bar area. You'll see the blue Back and Forward Arrow buttons. Try them to get a feel for their Undo and Redo operations.
- Scroll In and Out - Also in the scroll area is the Scroll Bar which lets the user scroll in and out of the map. The scroll bar displays the Zoom Level description as you shift magnification zones. You see a window pop-up to the left showing - Block, Town, City, District, County, etc. as you move out or in. Use the green + sign to Zoom-in through gradual levels.
- Also notice the quick out options - the USA flag and the World button to quickly pull out to wide area views.
- Double Click - Non-scroll bar related, simply double click your cursor on the map to Zoom in. Works best when no map layer are turned on because a mouse click tends to select map objects.