Invite your team
This article demonstrates inviting users to MapBusinessOnline team and creating sub-teams for map or data sharing.
See also: Share interactive map privately
Add users
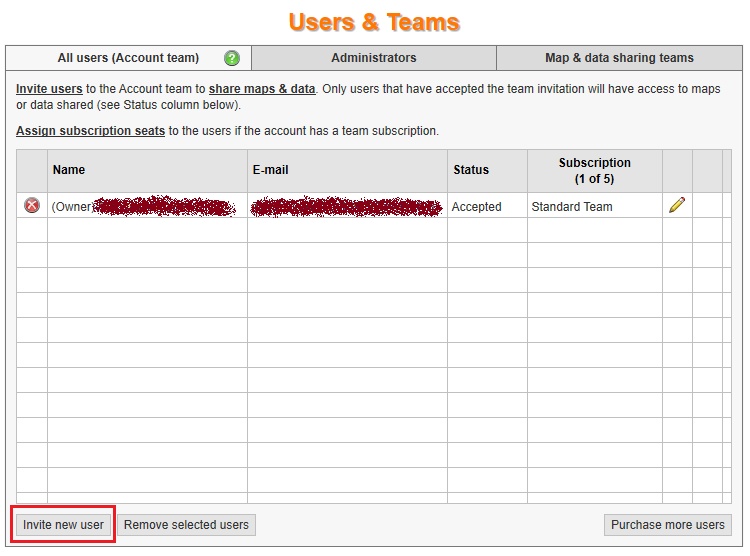
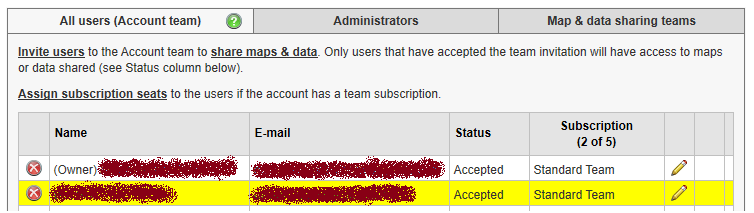
- To invite your team, go to Account/Users & Teams page. All users tab must be already selected by default. You will see your name there as the owner of the account.
Click Invite new user button to start adding Team users.
- Note: Administrators and Map & data sharing teams tabs, Subscription column are only available to team subscribers.
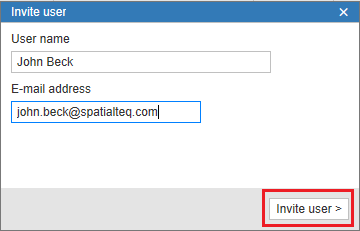
- Invite user wizard will start. Enter a user name and email address into the first dialog. Click Invite user.
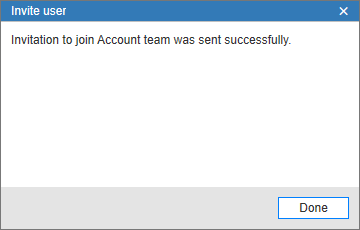
- MapBusinessOnline will send an e-mail to the invited user with a Web link to register MBO account (unless the user already has MapBusinessOnline account) and accept the invitation.
Click Done in Invite user wizard.
Note: each invited user will receive an individual link.
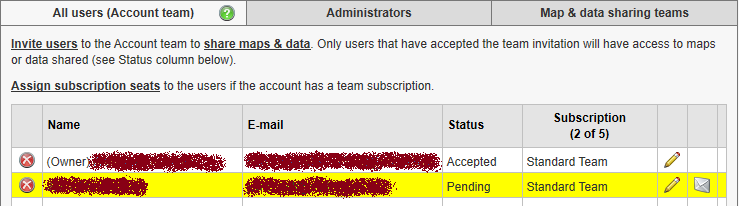
- As you can see now the user has been added to All users tab in Pending status. That means that you have invited the user and MBO is waiting invitation acceptance.
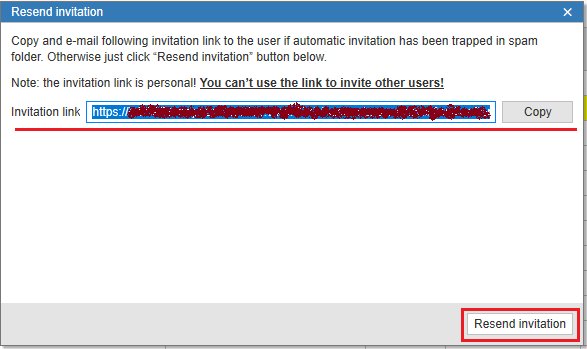
- In case you want to resend the invitation link to a user, click the Letter icon (on the right side of a row) and then hit Resend invitation button in the dialog that will popup.
The dialog will also have the invitation link that you can copy and send from your own e-mail address. MapBusinessOnline posts invitation e-mail directly to a user but in some corporate systems outside e-mail may be trapped as spam. To bypass the obstacle just copy the link and send it to your party.
- As soon as invited user accepts your invitation, the status in Account team will change from Pending to Accepted. Refresh your Web browser page to see a status change. You can share maps or data with a user in Accepted status!
Organize users into sub-teams
With Team subscription you can organize your users into teams (sub-teams or groups). Using teams greatly simplifies setting up shared map access.
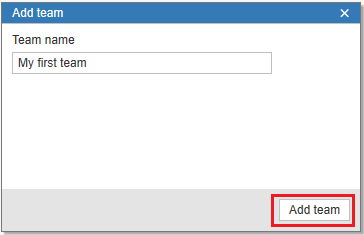
- Go to Account/Users & Teams page and select Map & data sharing teams tab. Click Add team button.

- Enter team name and click Add team button.
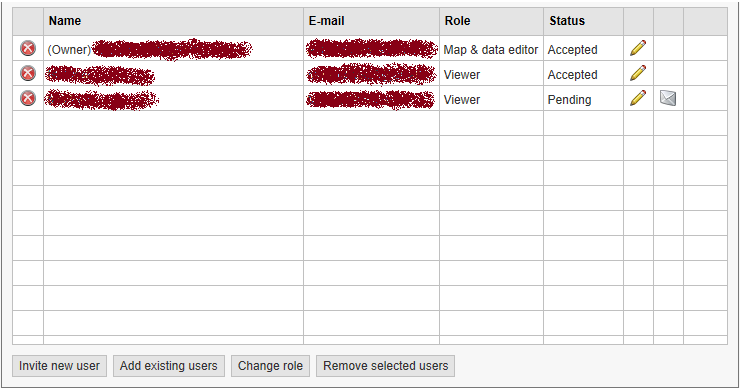
- Now you can add users to the team just created. Click Add existing users button at the bottom of Map & data sharing teams tab to add users you have earlier invited to your Account team.

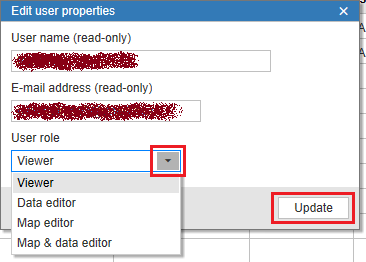
- In Add users dialog select all users you want to add to the team. Choose their role in the team. Following roles are supported:
- Viewer – user can only view shared map.
- Data editor – user can edit data records present on shared map but cannot modify the map otherwise.
- Map editor – user can modify and save shared map but cannot edit data records present on the map.
- Map & data editor – user has full access rights to the map.
If you want to setup individual roles, just pick a role in the dialog as you will be able to change individual roles later. Click Add users button.

- Selected users will be added to the team. Now you can change individual user roles in the team by clicking Pencil button.
- You have your first team setup!


