Map drawings tips & tricks
This article provides tips and tricks on using map drawings in MapBusinessOnline.
Map drawing tools and drawing figures (drawings) are quite intuitive in MapBusinessOnline and provide functionality similar to other products. Anyway some advanced use tips can be helpful.
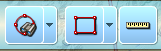
- There are search and drawing tools on MapBusinessOnline toolbar. Both flavors of tools produce the same type of drawing. The difference is that search tools run spatial search right after map drawing is created.
- You can select a drawing on map by clicking it. When new drawing is created with a drawing tool the drawing is automatically selected. When drawing is selected it shows small toolbar with following icons: binocular icon (if available) to search data within drawing, gear icon to show Properties dialog for drawing, and delete icon to delete drawing.

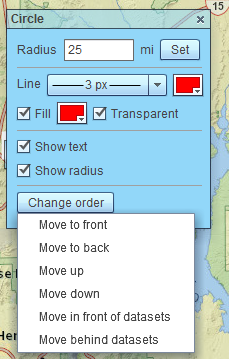
- Click gear icon on selected drawing’s toolbar to open its Properties dialog. All drawing properties are accessible through this dialog.
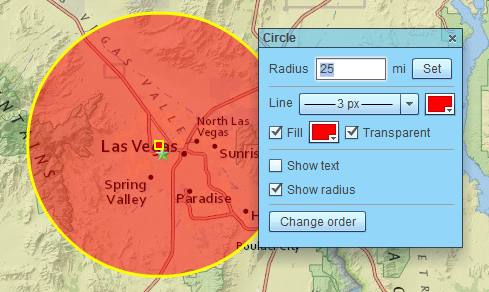
- With circle tool you can simply click center location on map and then enter radius into dialog that pops up.
- You can move selected circle drawing by its center. Just press mouse button when mouse cursor is over circle’s center and move mouse cursor without releasing mouse button.
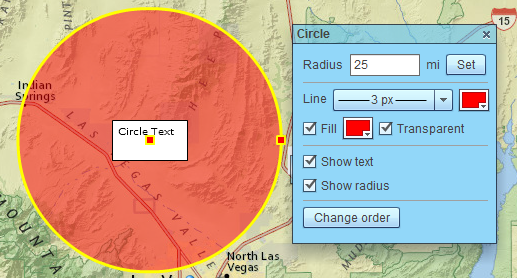
- Move selected text drawing by dragging yellow line around text.
- You can add child text box to any drawing. Just check ‘Show text’ box in drawing’s Properties dialog.
- Move drawings relative to each other or move them above or under datasets.
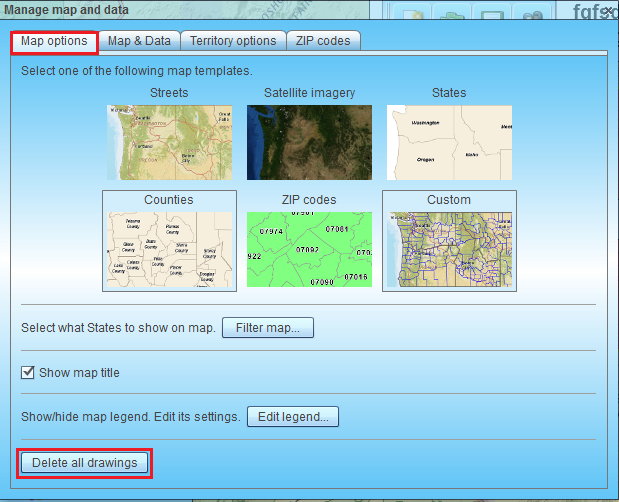
- You can delete all drawings from map through ‘Manage map and data’ dialog.
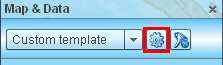
- If Map & Data window is not visible then click Map & Data tab centered on the left side of the map.

- Click gear icon on Map & Data window toolbar. ‘Manage map and data’ dialog will pop up.
- Inside ‘Manage map and data’ dialog select ‘Map options’ page and click ‘Delete all drawings’.
Click ‘Yes’ to confirm deleting all drawings.
- If Map & Data window is not visible then click Map & Data tab centered on the left side of the map.