How to Balance Territories Using Data Bars
Balancing territories ensures workloads are distributed fairly and that your team can cover markets effectively. With the introduction of Data Bars and enhanced map tools in MapBusinessOnline, you can quickly identify imbalances and adjust territories directly on the map. This guide walks through one workflow: balancing territories by reassigning ZIP codes with the help of Data Bars and map-based selection.
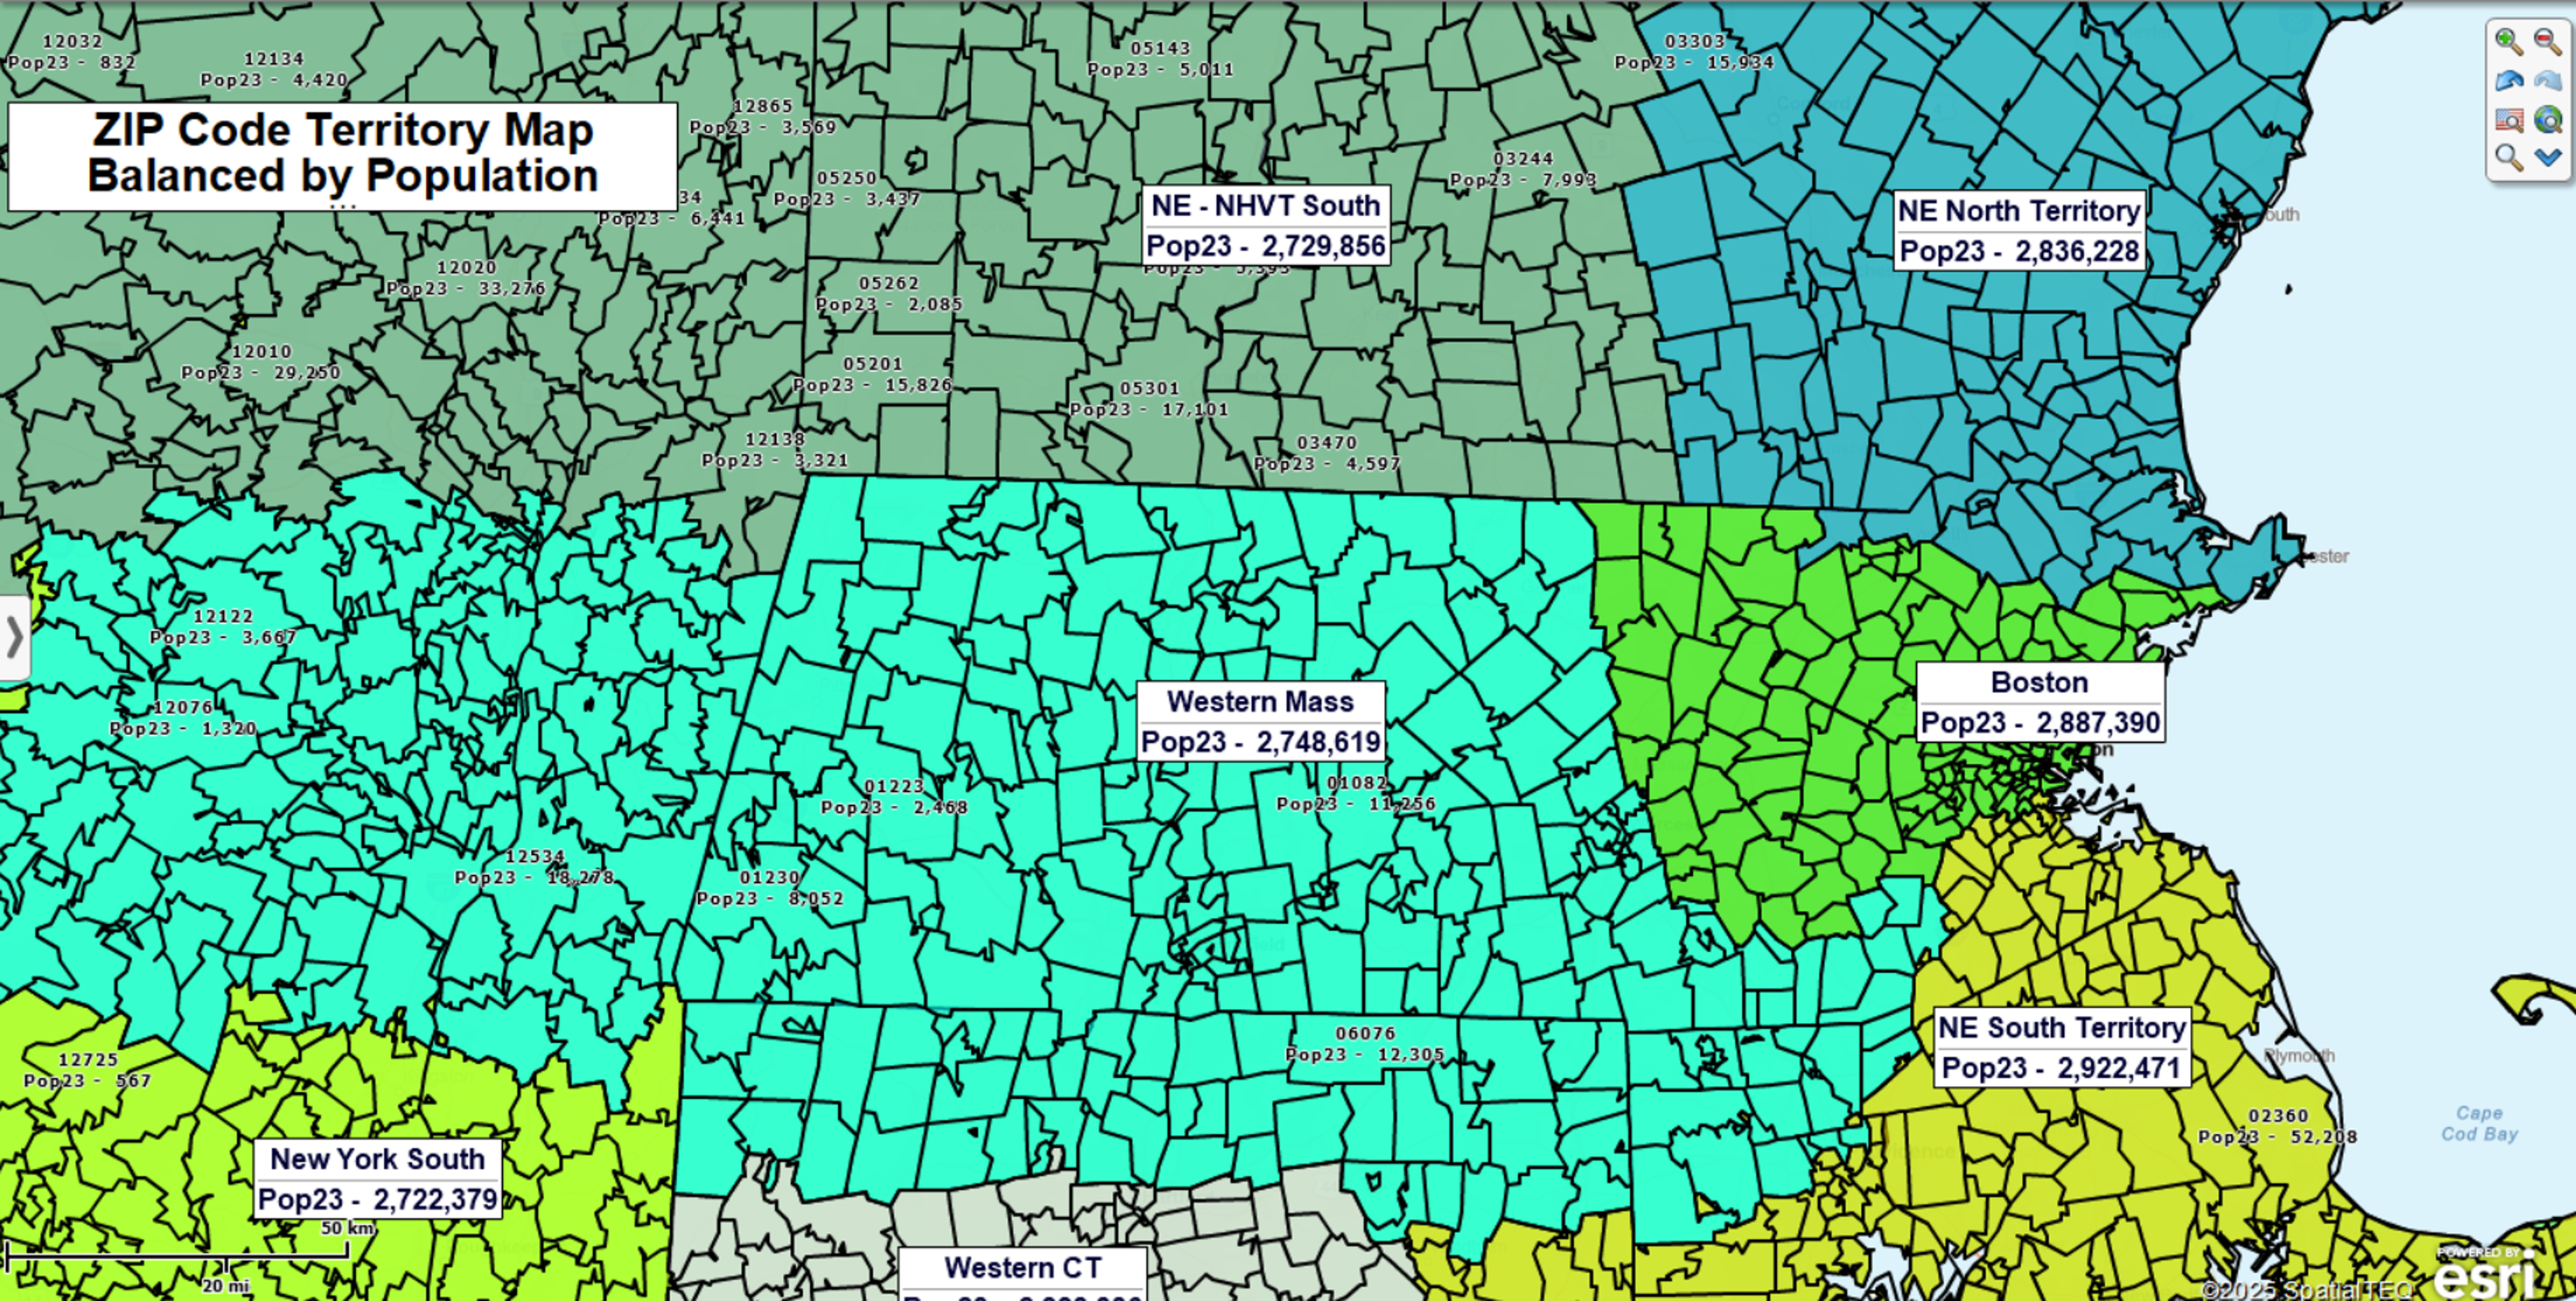
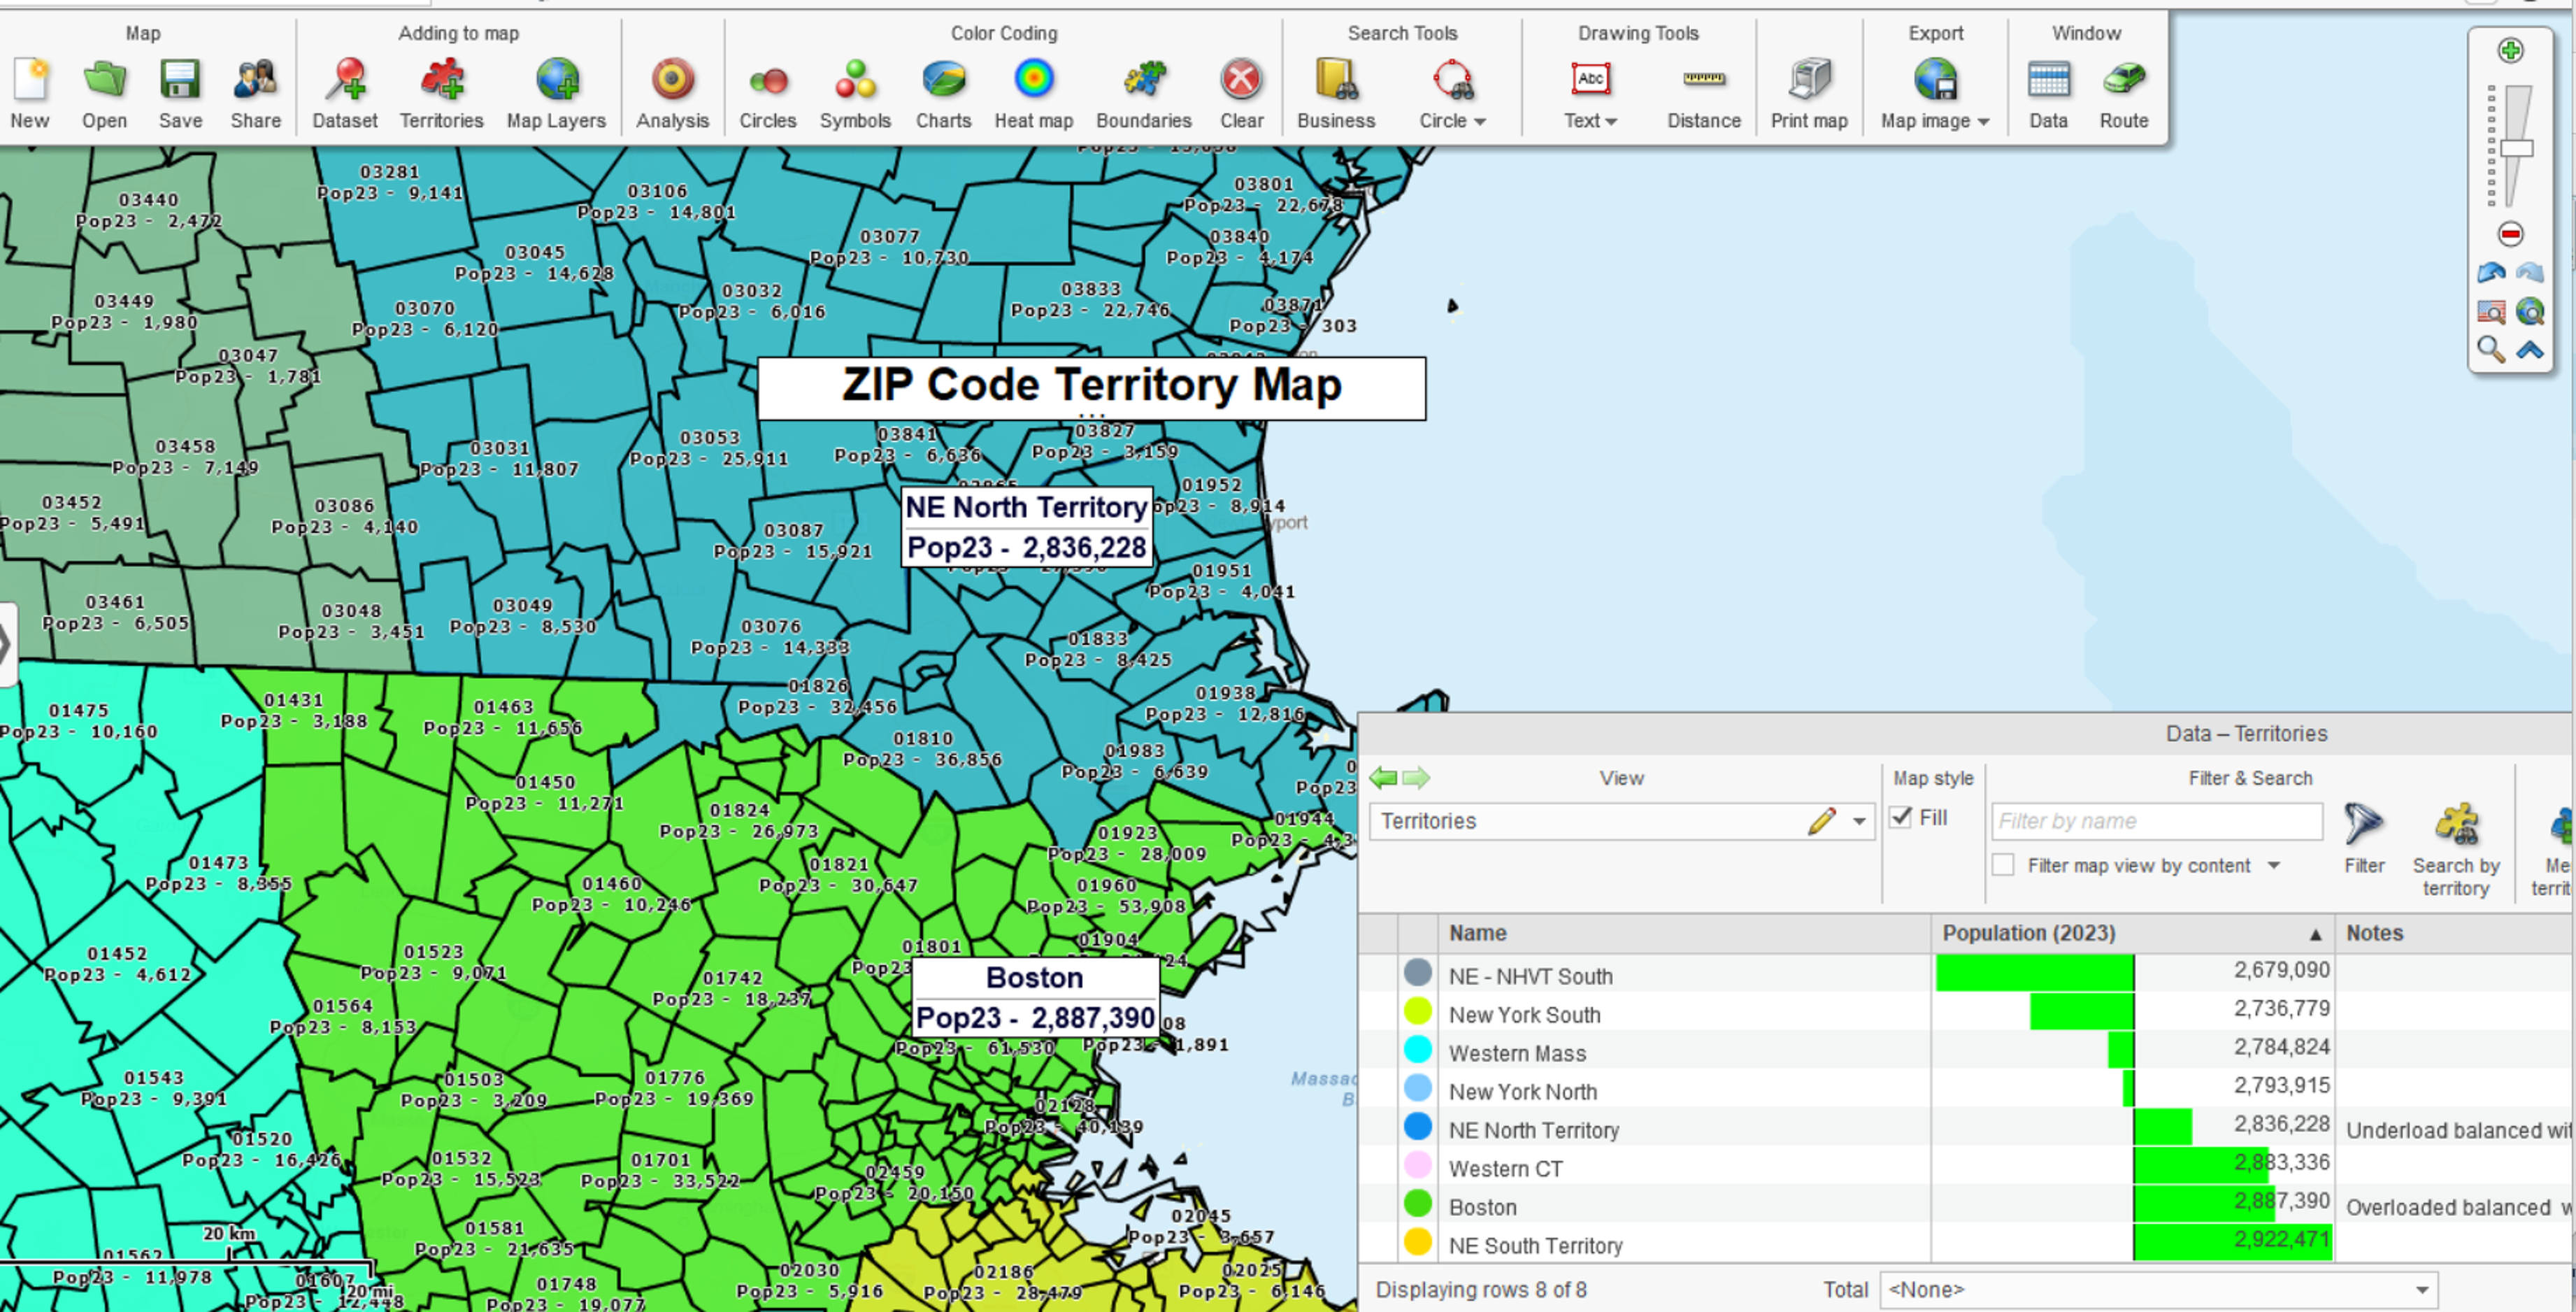
Step 1: Review Territory Balance with Data Bars
Open the Data Window and select your territory layer. Add Data Bars to the numeric data column you want to balance (for example population or sales).
Data Bars support several display types. For balancing, the Midpoint & tolerance type is particularly useful.
- Midpoint represents your target value for territories (e.g., the desired population per territory). Viewing the entire list of territories, with a balancing factor column midpoint assigned, helps define what general numeric value each territory should consist of.
- Tolerance sets the allowable range, as a percentage (e.g., 10–15%). Tolerance can be used to identify territories that do not require balancing and those that are in immediate need of adjustment.
- Bars are automatically colored to show whether a territory falls within the range, or below the range, or exceeds it.
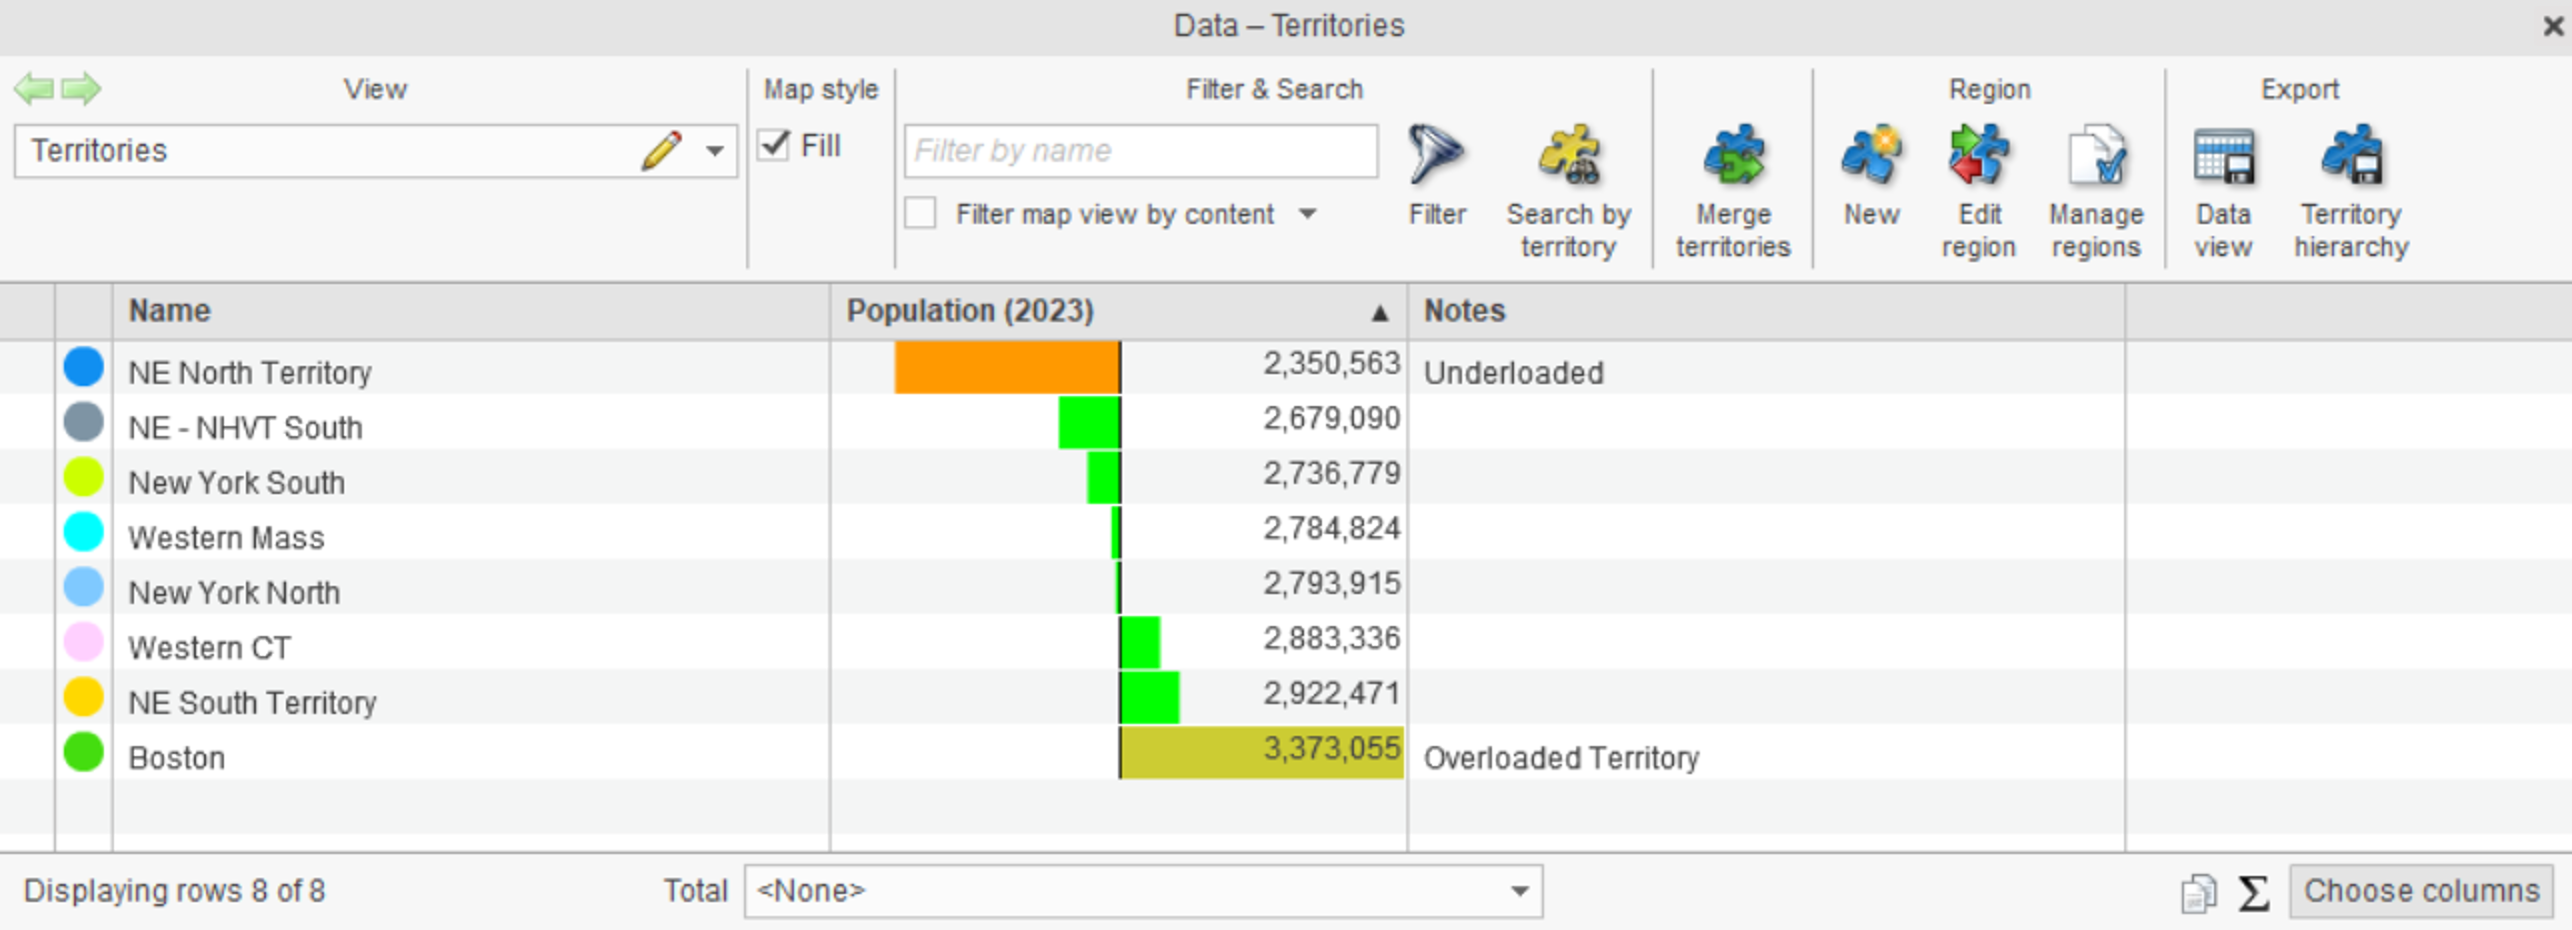
This view makes it easy to see which territories are overloaded and which need additional constituents, or in this case ZIP codes.
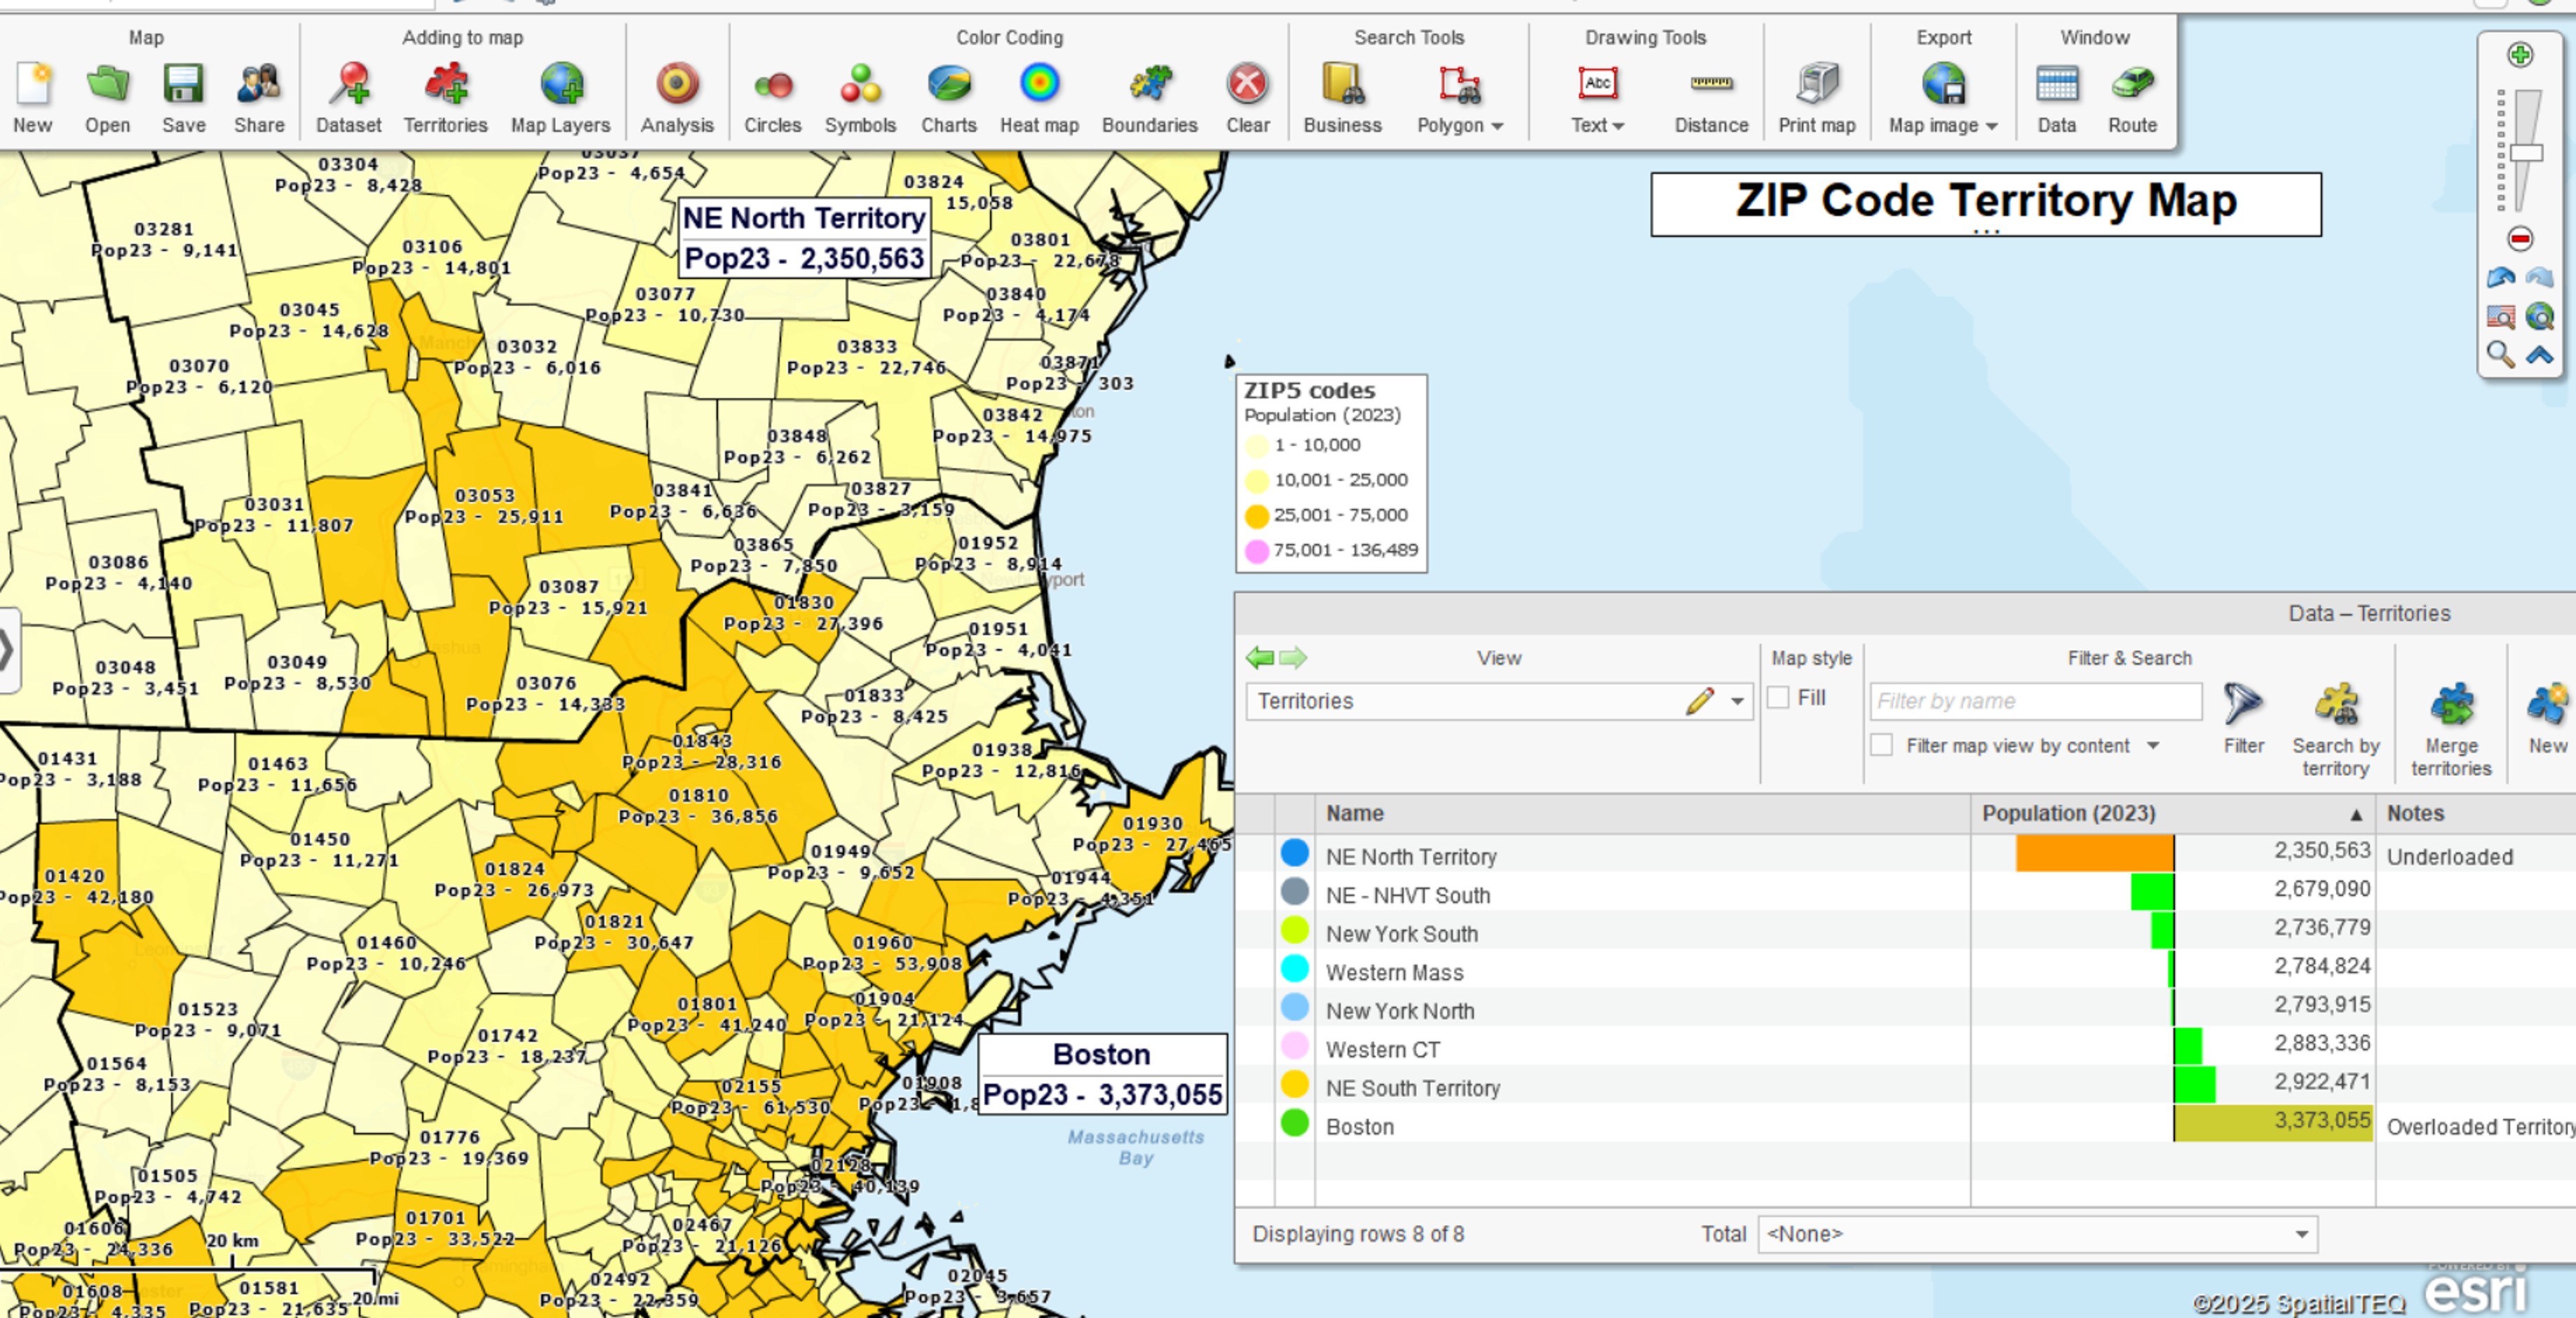
Step 2: Adjust the Map for Reassignment
To make balancing even easier:
- Color-code ZIP codes by the same variable you’re balancing (e.g., population).
- Make the territory layer transparent and hide internal boundaries so ZIP code shading is visible.
- Add labels (such as population values) to ZIP codes for additional context.
This setup lets you quickly identify ZIP codes near the border of two territories that can be reassigned to help achieve balance.
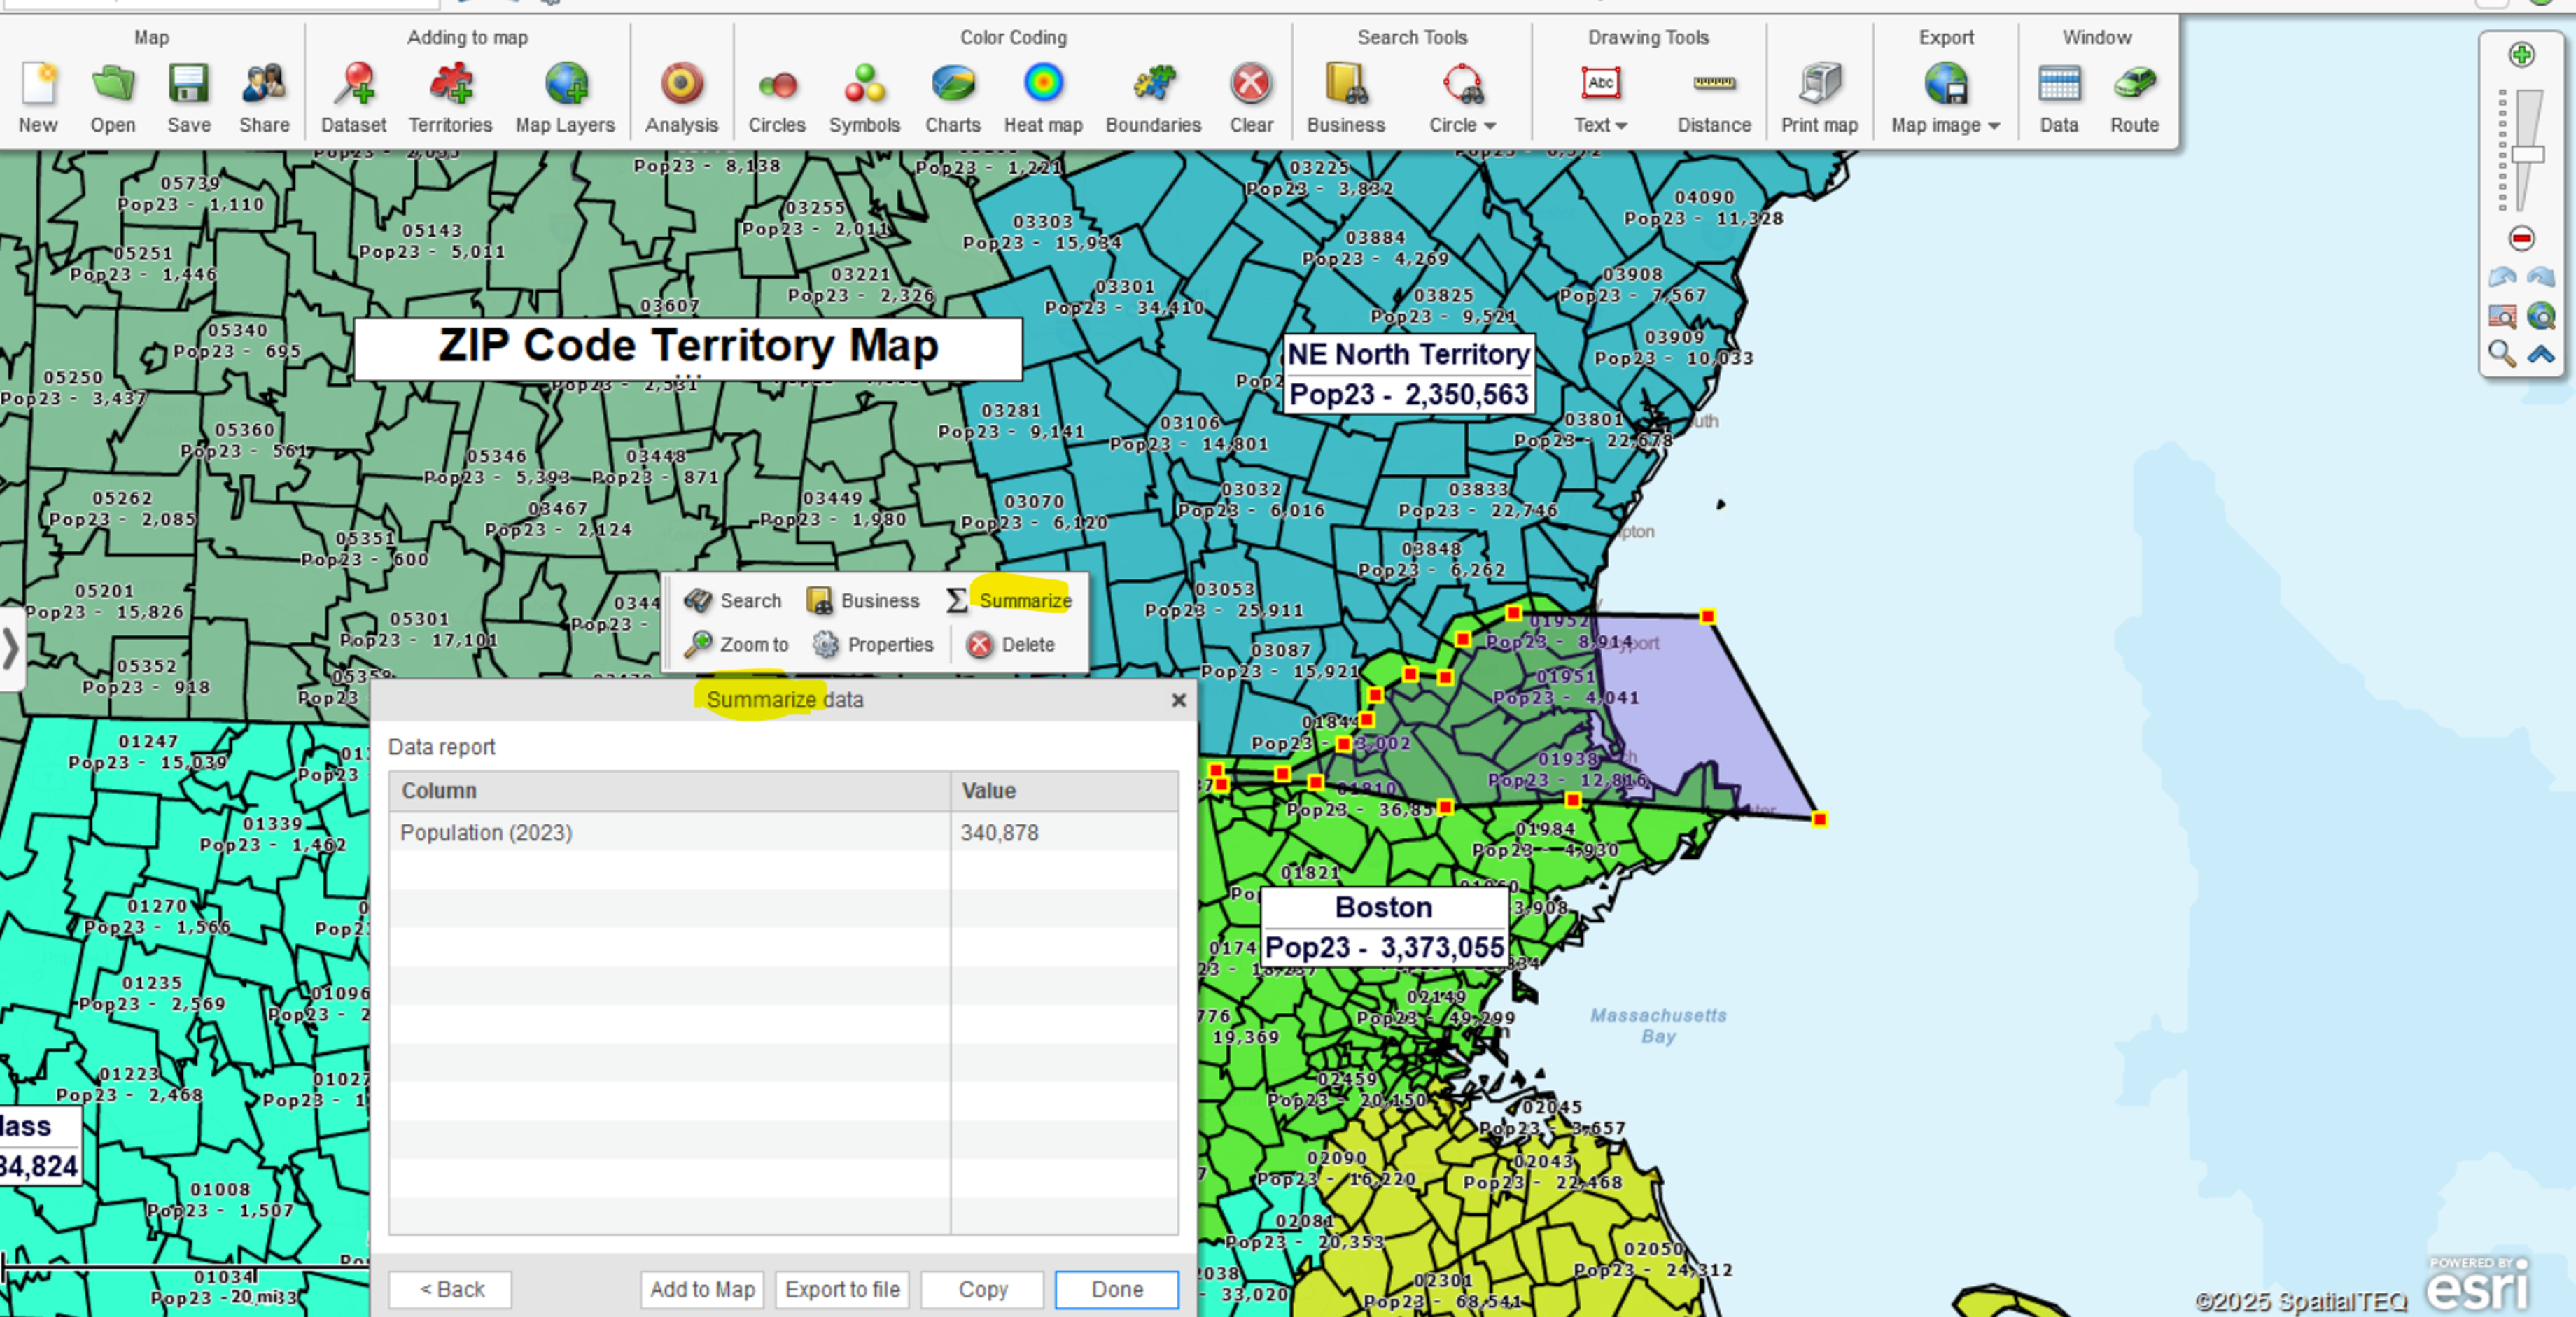
Step 3: Select ZIP Codes for Balance Transfer
On the map, select a group of ZIP codes from the border of an overloaded territory.
- Use the Summarize button to quickly check the total population (or other variable) of your selection.
- Continue selecting until you reach the amount needed to bring the territory closer to the target (for example, about 500,000 in population).
Step 4: Reassign ZIP Codes
After selecting the ZIP codes on the map, click Edit Territory and choose the Move to territory operation. Then select the neighboring territory with the lower population to achieve a better balance. Once applied, the ZIP codes are removed from the original territory and added to the selected one.
Then use the Show territories button in the Data Window to quickly switch from a detailed ZIP code list back to the overall territory balance view. This makes it easy to confirm that the adjustment worked and see if further balancing is needed.
Step 5: Review and Adjust Again if Needed
With Data Bars in Midpoint & tolerance mode, it’s clear at a glance whether territories are now within your target population range. If one is still outside of the tolerance, repeat the selection and reassignment process until the Data Bars show a balanced distribution.
Conclusion
Balancing territories no longer requires guesswork. By combining Data Bars with Midpoint & tolerance, map-based ZIP code selection, and tools like Summarize and Show territories, you can quickly adjust workloads and create territories that are both fair and efficient.
Do you have questions about territory balancing? We’re here to help.


