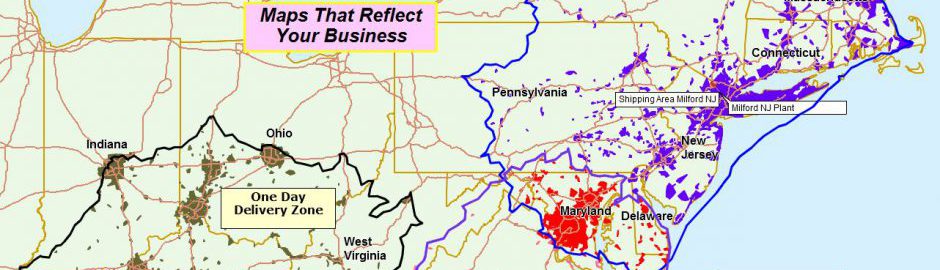
The most frequently used feature of Map Business Online is the import of user location data. Usually, this imported data is an address-based list, but it could be latitude/longitude coordinates or just plain a plain ZIP code list. The point is many business mapping users import their business data into Map Business Online.
Once user location-based data is imported, Map Business Online business mapping software applies symbols to the locations, usually a simple set of colored dots. The user can easily adjust those dots from the Data Window or in Map and Data, changing the color or choosing a new symbol from our symbol library. In the data window choose the layer and then, just to the right of the data selection drop down, you’ll find the symbol selector. Have at it.
In Map and Data, hover over the imported data layer, click the Edit Properties Gear and you will again see the symbol selector. And again, have at it.
The symbol library is also available in the Color Code with Symbols button along the Master Toolbar. This access to the symbol selector button allows Map Business Online users to create symbolization schemes based on elements of their imported data. For example, mapping users may color-code by revenue history, by account type, or even by sales rep, the only limiting factor is a range of 100 variables. Watch a video on color coding points.
By choosing the Color Code by Symbols button, ten buttons in from the left along the master toolbar, the user can access their data column for color-coding through a simple drop-down selection. There’s a range selection for expressing many options, but I typically keep that range to under six variables in your data. But that’s up to you.
You’ll see the symbol selector (see image below) with a drop down for symbol library access, and a color box associated with each symbol option. Once you’ve selected your preferred symbols and color simply process by clicking Done. It’s easy to return to the beginning and adjust further.
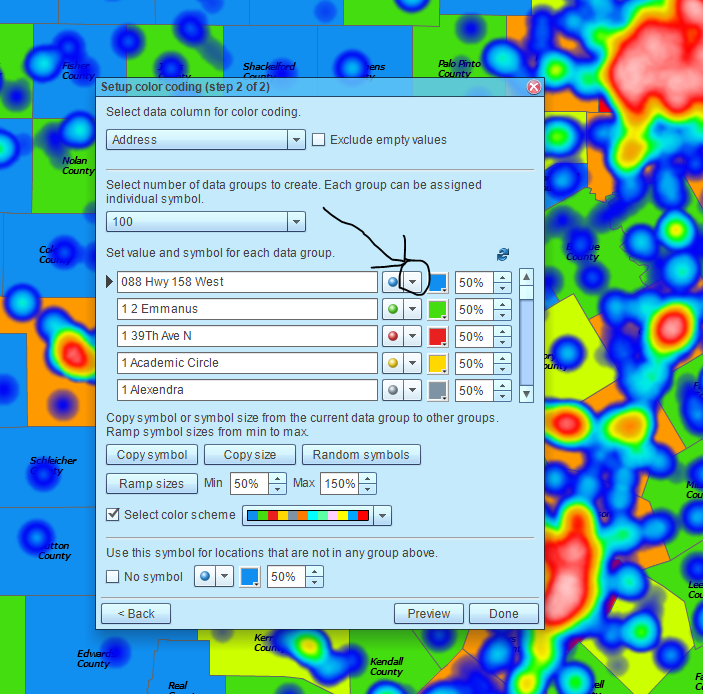
The Symbol Selector
Custom Symbols
User-defined custom symbols may be selected from any presentation of the symbol selector library. Here’s how:
- Click the down arrow to enter the symbol selector library
- In the library of symbols use the scroll bar on the right side to scroll all the way to the top
- Click Manage Custom Symbols, then click Choose New Symbol, and browse to your file
- Once your file is selected click Add. Now your new symbol is a member of your mapping software’s symbol library.
You can access your customer symbols at the top of the library. Scroll to the top and select as usual.
Custom symbols are useful for adding flair to your map. A custom symbol may be appropriate for your map if you need to make a geographic reference obvious. These symbols could be medical symbols, oil & gas symbols, or a picture of Bradley Cooper. Choose custom symbols that make your map audience feel at home. You know your audience, you decide.
Win a $20 Gift Card! Refer a business associate to Map Business Online in exchange for a $20 Amazon Gift Card!
Find out why over 25,000 business users log into www.MapBusinessOnline.com for their business mapping software and advanced sales territory mapping solution. The best replacement for Microsoft MapPoint happens to be the most affordable.
Contact: Geoffrey Ives geoffives@spatialteq.com or Jason Henderson jhenderson@spatialteq.com