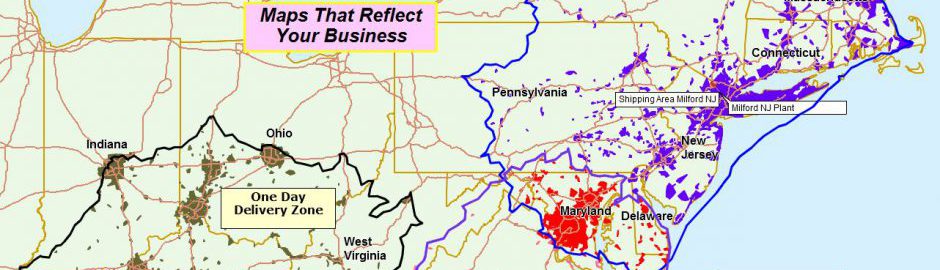
Why does a business install business mapping software? The short answer is to improve your business performance through location-based analysis and map visualizations.
But your child might need MapBusinessOnline someday. Oh yes, they actually might.
I took some time this week to create a history map using MapBusinessOnline. I tested the process to make sure I could create a ‘good enough’ map to get a grade of B or higher on an American History project assignment.
The assignment was to create a USA map that showed the significant areas of the contiguous USA land acquisition west of the Mississippi from the year 1800 on. I learned a few things about MapBusinessOnline in the process.
For those not ‘in the know,’ Contiguous means sharing a common border or touching. So, we’re not going to worry about Alaska and Hawaii for this map. But MapBusinessOnline does have options for capturing the conterminous USA (including Alaska and Hawaii), if’n you require it someday.
Use the Draw Tools
For most of the map work on my homework assignment, I used the Draw Tools located on the right side of the Master Toolbar. I selected the Free Form line tool to draw my boundary lines. I had not used the Free Form line tool very often before this exercise.
Here are a few tips on my process:
Drawing the Polygon
- It’s easy to delete any line you’ve started and draw again. So, don’t get too frustrated as you get used to the tools. Just restart a new line. As you pull, the line moves quickly and takes some getting used to time. Please give yourself a few tries to get the hang of it.
- You’ll be able to go back and make line adjustments, so don’t try to be perfect. (See editing tips below.)
- Use state boundaries and rivers, where possible, as a trace line rather than free drawing the whole thing. For instance, when drawing in the Louisiana Purchase, you can tell where some boundaries follow significant rivers. When drawing a curved line representing free-form boundaries, other areas may require a steady hand. Use these map features as a guide for your boundaries.
- Complete the drawn line back to the beginning, and the polygon will display as a whole. Uncheck the polygon fill until you’ve established the territory label (see next section.)
Labeling
- After completing the polygon, select the option to create a territory from the County layer. Then, in Map and Data, uncheck the territory fill on the territory layer to allow the draw-layer to reflect the historical area of interest, not the territory. We’re going to use territory labels, so remember to uncheck the polygon fill for any editing to territory labels moving forward.
- Still editing the territory map layer, hide the internal county boundaries. Adjust territory boundaries to your liking.
- I used the Territory Name label for labeling the various land acquisitions. Adjust the territory label to have a white background because it will show through the polygon fill more prominently.
- I also added TextBoxes using the Draw Tool option for Text Box to show land purchase values where I could find them.
- Once complete, turn the polygon fill back on and adjust as required.
- Lastly, use the Map Title insert for a map like this. You will find Map Title in the main panel of Map and Data options towards the bottom.
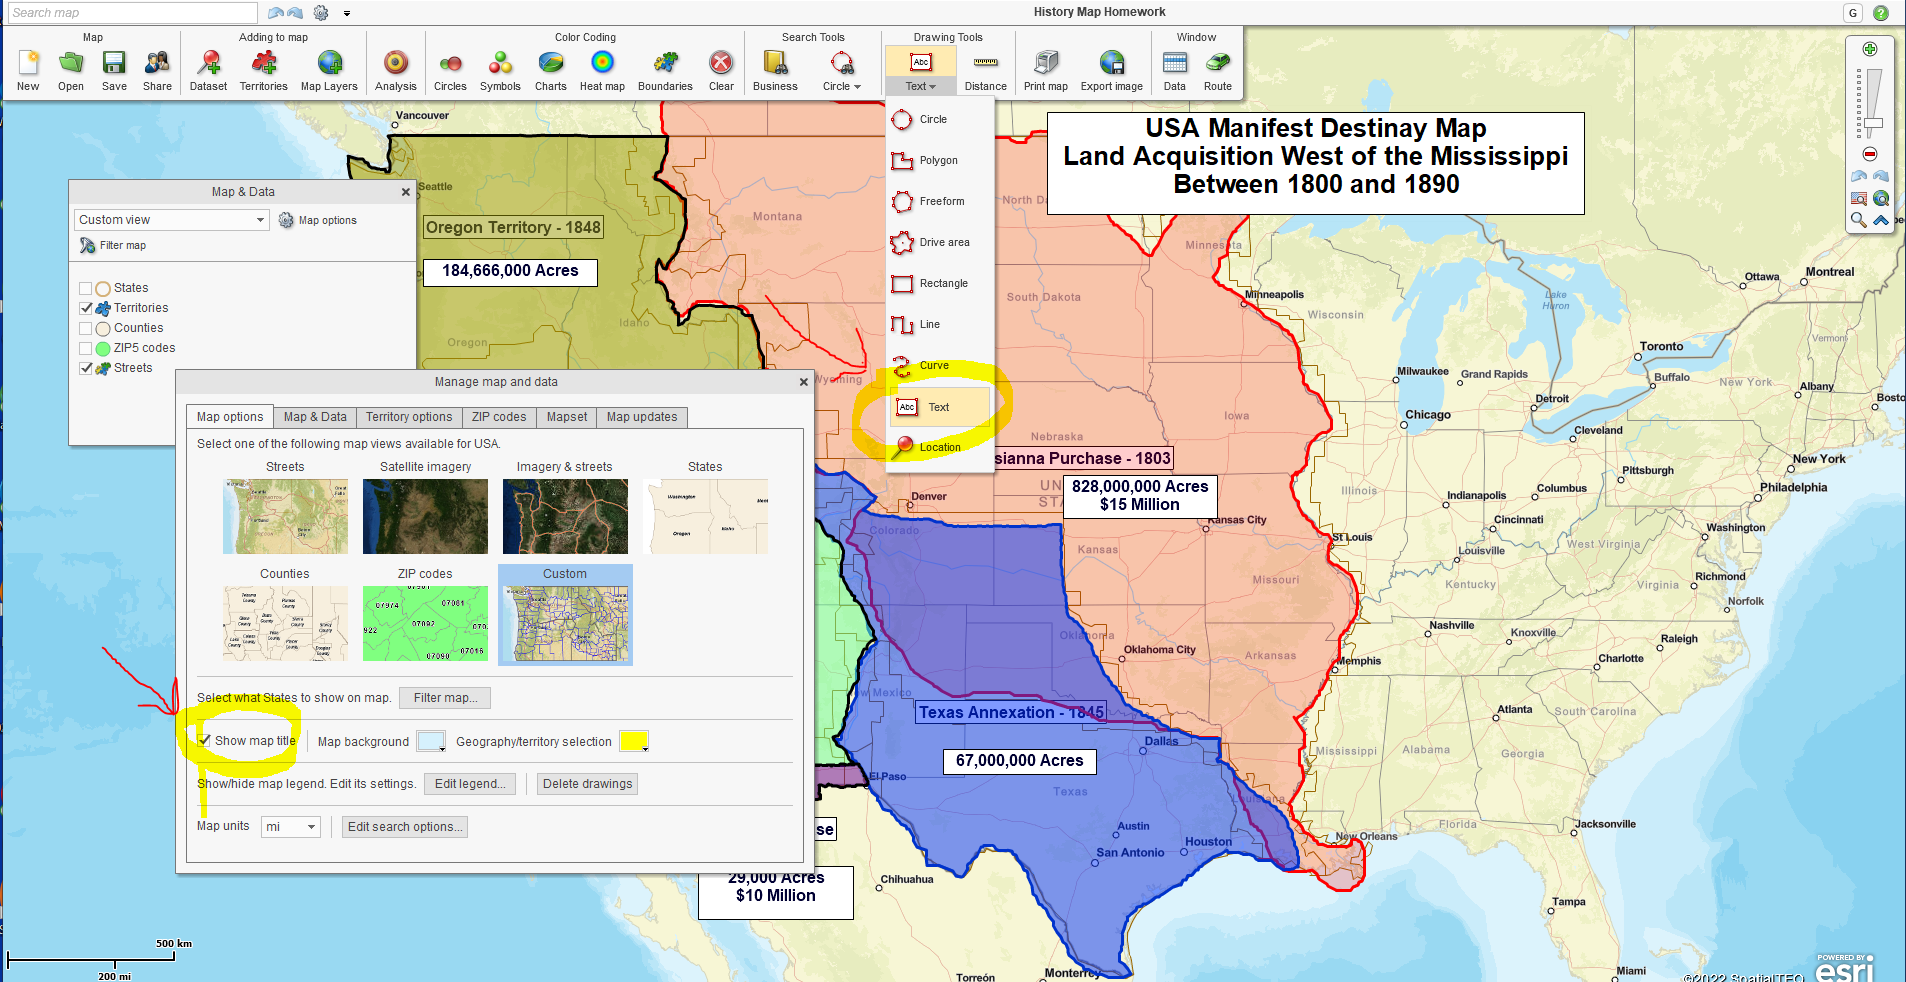
Access TextBoxes and Map Title.
Fine Tuning Your Maps Look
- Some area borders will show holes and gaps as you add new acquisitions. Zoom into those areas and adjust the lines by pulling the Yellow nodes to appropriate boundary points to line up the boundary lines between sections. As you do this, you will see that it is pretty easy to true up the side-by-side boundaries. It doesn’t need to be perfect. A zoomed-out view will look pretty good.
- Use the Zoom tool (the magnifying glass icon) in the navigation scroll bar (upper right corner) to zoom into areas needing a touch-up. Editing the drawn lines is essential to generating a compelling homework map.
- Once you reach an area for editing, select a yellow highlighted node, and move the node to your desired location. You will see the line shift with the node adjustment. Keep moving nodes until your line is to your liking. I find dragging a selected node to a turning point on the matching borderline makes the process move faster and more accurately.
- Notice that you can select a node for way out-of-whack lines and delete it. Just click on the node, and the associated mini toolbar offers you a ‘Delete Selected Point’ option. This process helps correct line placements.
- Once your node editing is complete, click away from the drawn line, and it will save.
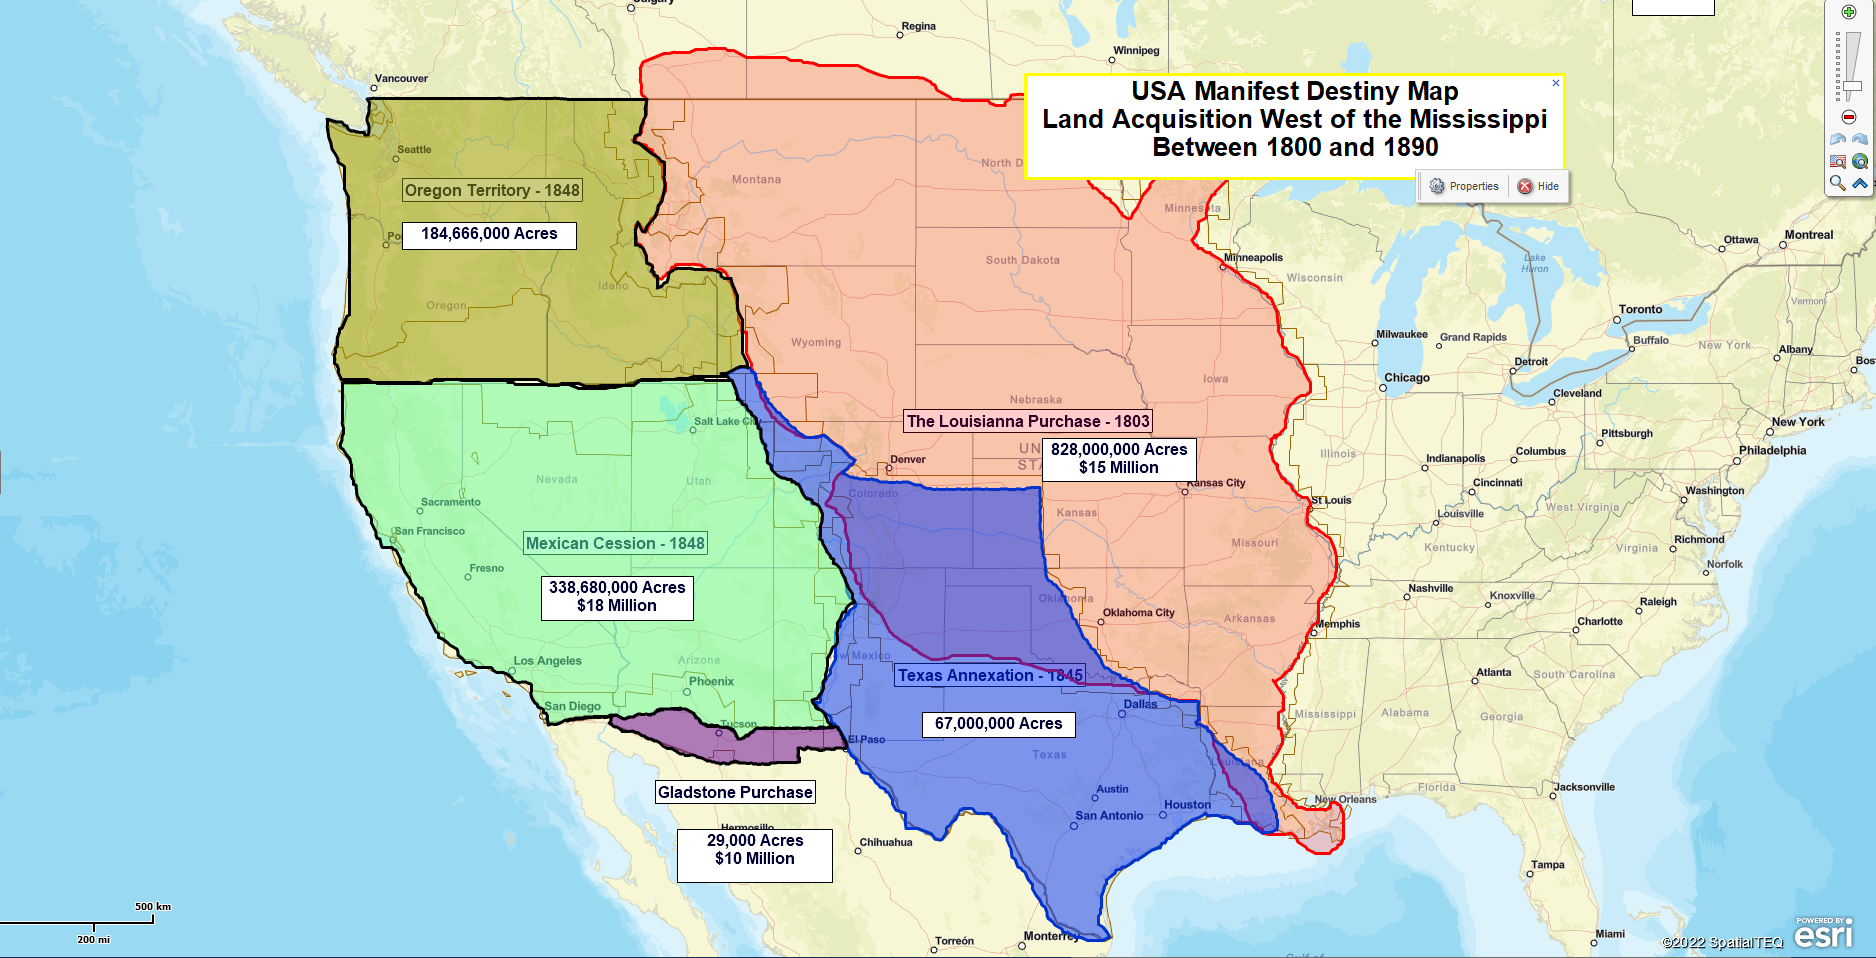
USA Manifest Destiny Map
I traced eye-balled the online maps I could find of:
- The Lousiana Purchase.
- The Annexation of Texas.
- The Mexican Cession.
- The Oregon Territory.
- The Gladstone Purchase.
So the next time your kids ask for help with geography, don’t pretend you’ve got a call you have to take. Show them MapBusinessOnline and have some good old-fashioned geographic fun with the little guy or gal. You can do it! I bet you never thought you’d hear about the Gladstone Purchase ever again.
And while you’ve got their attention, ask them how to get maps on Instagram.
_______________________________________________
Over 25,000 business users log into www.MapBusinessOnline.com for their business mapping software and advanced sales territory mapping solution. The best replacement for Microsoft MapPoint happens to be the most affordable.
To access MapBusinessOnline, please register and download the Map App from the website – https://www.mapbusinessonline.com/App-Download.aspx.
After installing the Map App, the MapBusinessOnline launch button will be in the Windows Start Menu or Mac Application folder. Find the MapBusinessOnline folder in the Start Menu scrollbar. Click the folder’s dropdown arrow and choose the MapBusinessOnline option.
The Map App includes the Map Viewer app for free non-subscriber map sharing.
Please read customer reviews or review us at Capterra or g2crowd.
Contact: Geoffrey Ives at geoffives@spatialteq.com or Jason Henderson at jhenderson@spatialteq.com