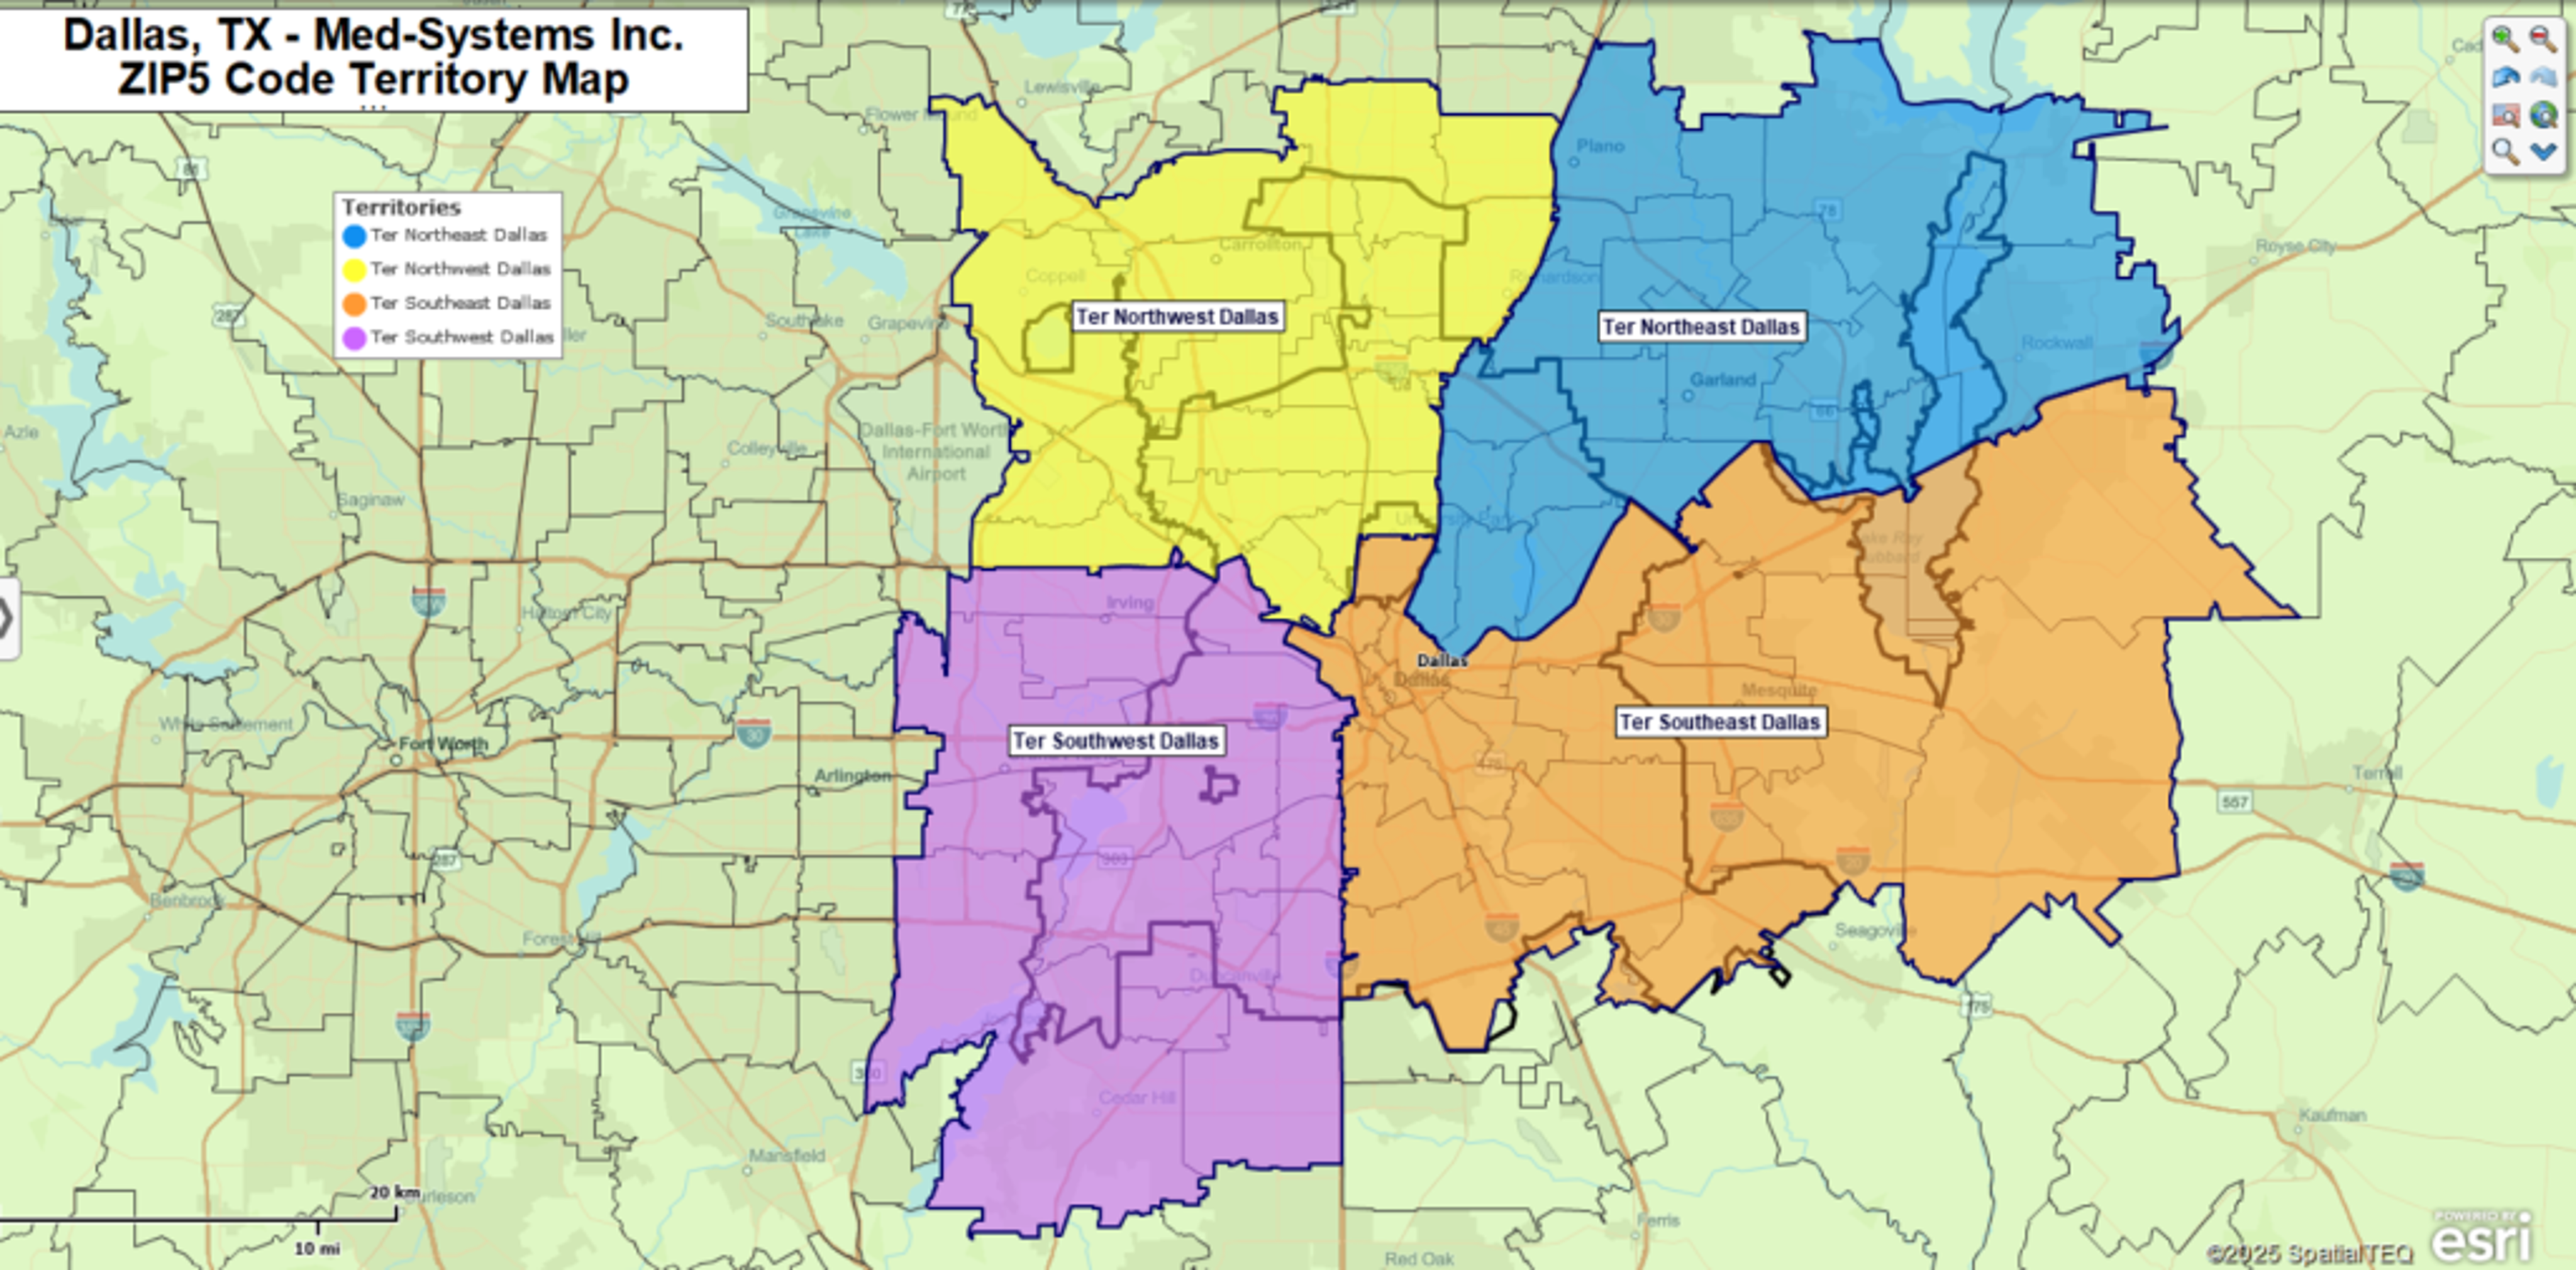
How To Create A Territory Map by ZIP Code
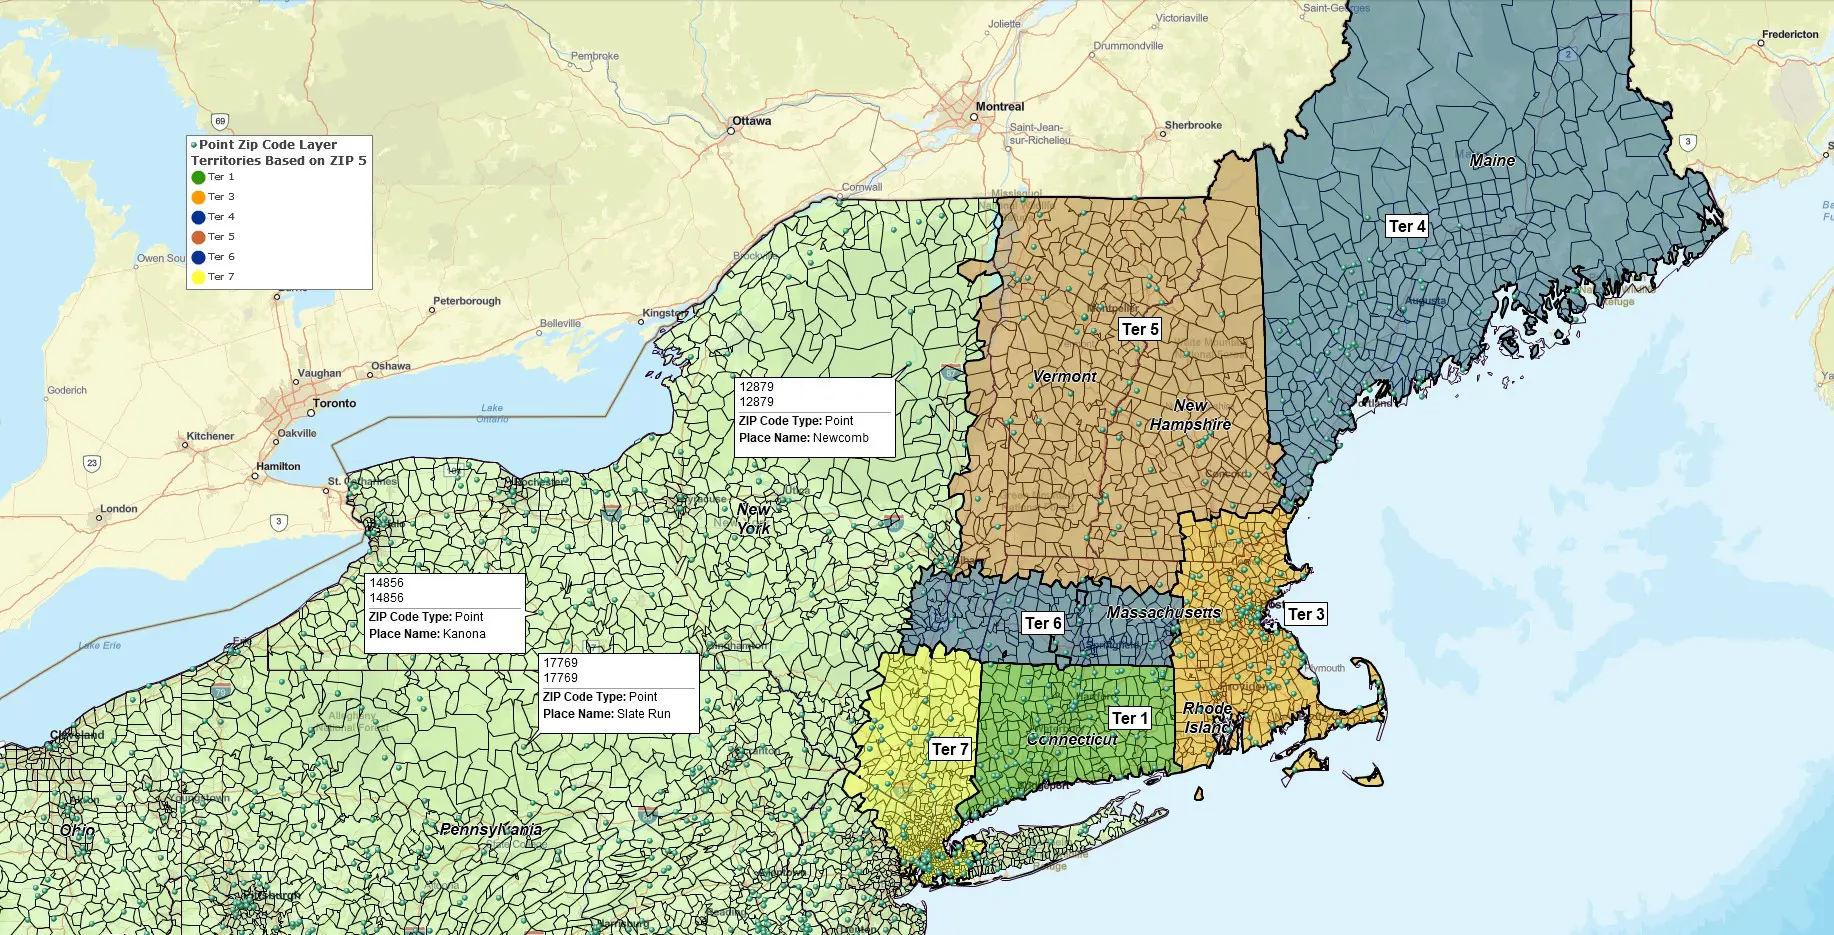
A territory map is a geographic shape defining an area of responsibility. Using territory mapping software like MapBusinessOnline, a territory map is created by lasso selection or by compiling an importable list of geographic districts, usually ZIP codes, counties, or states. ZIP code territory maps are most popular.
In other words, the mapping software allows you to collect a group of ZIP codes with a mouse cursor or import a spreadsheet of preassigned ZIP codes associated with a column of territory names. ZIP code territory maps in MapBusinessOnline include a map visualization and a table view of the data, useful for analysis.
Multiple industries apply territory mapping; examples include:
- Franchise territory development.
- Manufacturing sales territories.
- Car dealership territories.
- Insurance company customer maps, claims maps, and insurance agent territories.
- Healthcare mobile staff territory management.
- Expansion planning maps.
- Market analysis maps.
To name just a few.
Steps to Build a ZIP Code Territory Map
The steps to building a ZIP code territory map, the most popular territory map alignment, using MapBusinessOnline are:
- Turn on the ZIP code map layer in Map and Data.
- Create a spreadsheet with ZIP code column and a territory name column – import that list using the Territories button under the Adding to Map section of the Master Toolbar,
- or, Lasso a group of ZIP codes on a map using a polygon search tool, and name each territory.
- Adjust the territories as required, adding or removing ZIP codes by selecting them with your mouse cursor and editing as necessary.
- Use the Data Window and the Change Columns button to display the territory parameters you need.
Business map users most often apply ZIP codes to online sales territory mapping. For local and regional businesses, ZIP codes provide manageable areas of accountability which can be assigned to traveling clinicians, technicians, field agents, or salespeople. ZIP Codes are also convenient administrative units that a layperson intuitively understands.
ZIP Code Territory Analysis
ZIP code territory maps generated using business mapping software include data analysis views that combine disparate data layers into a detailed assessment of a territory’s underlying business DNA. You’ll be able to add population, income, and ethnicity layers (to name a few) while appending your own imported business data.
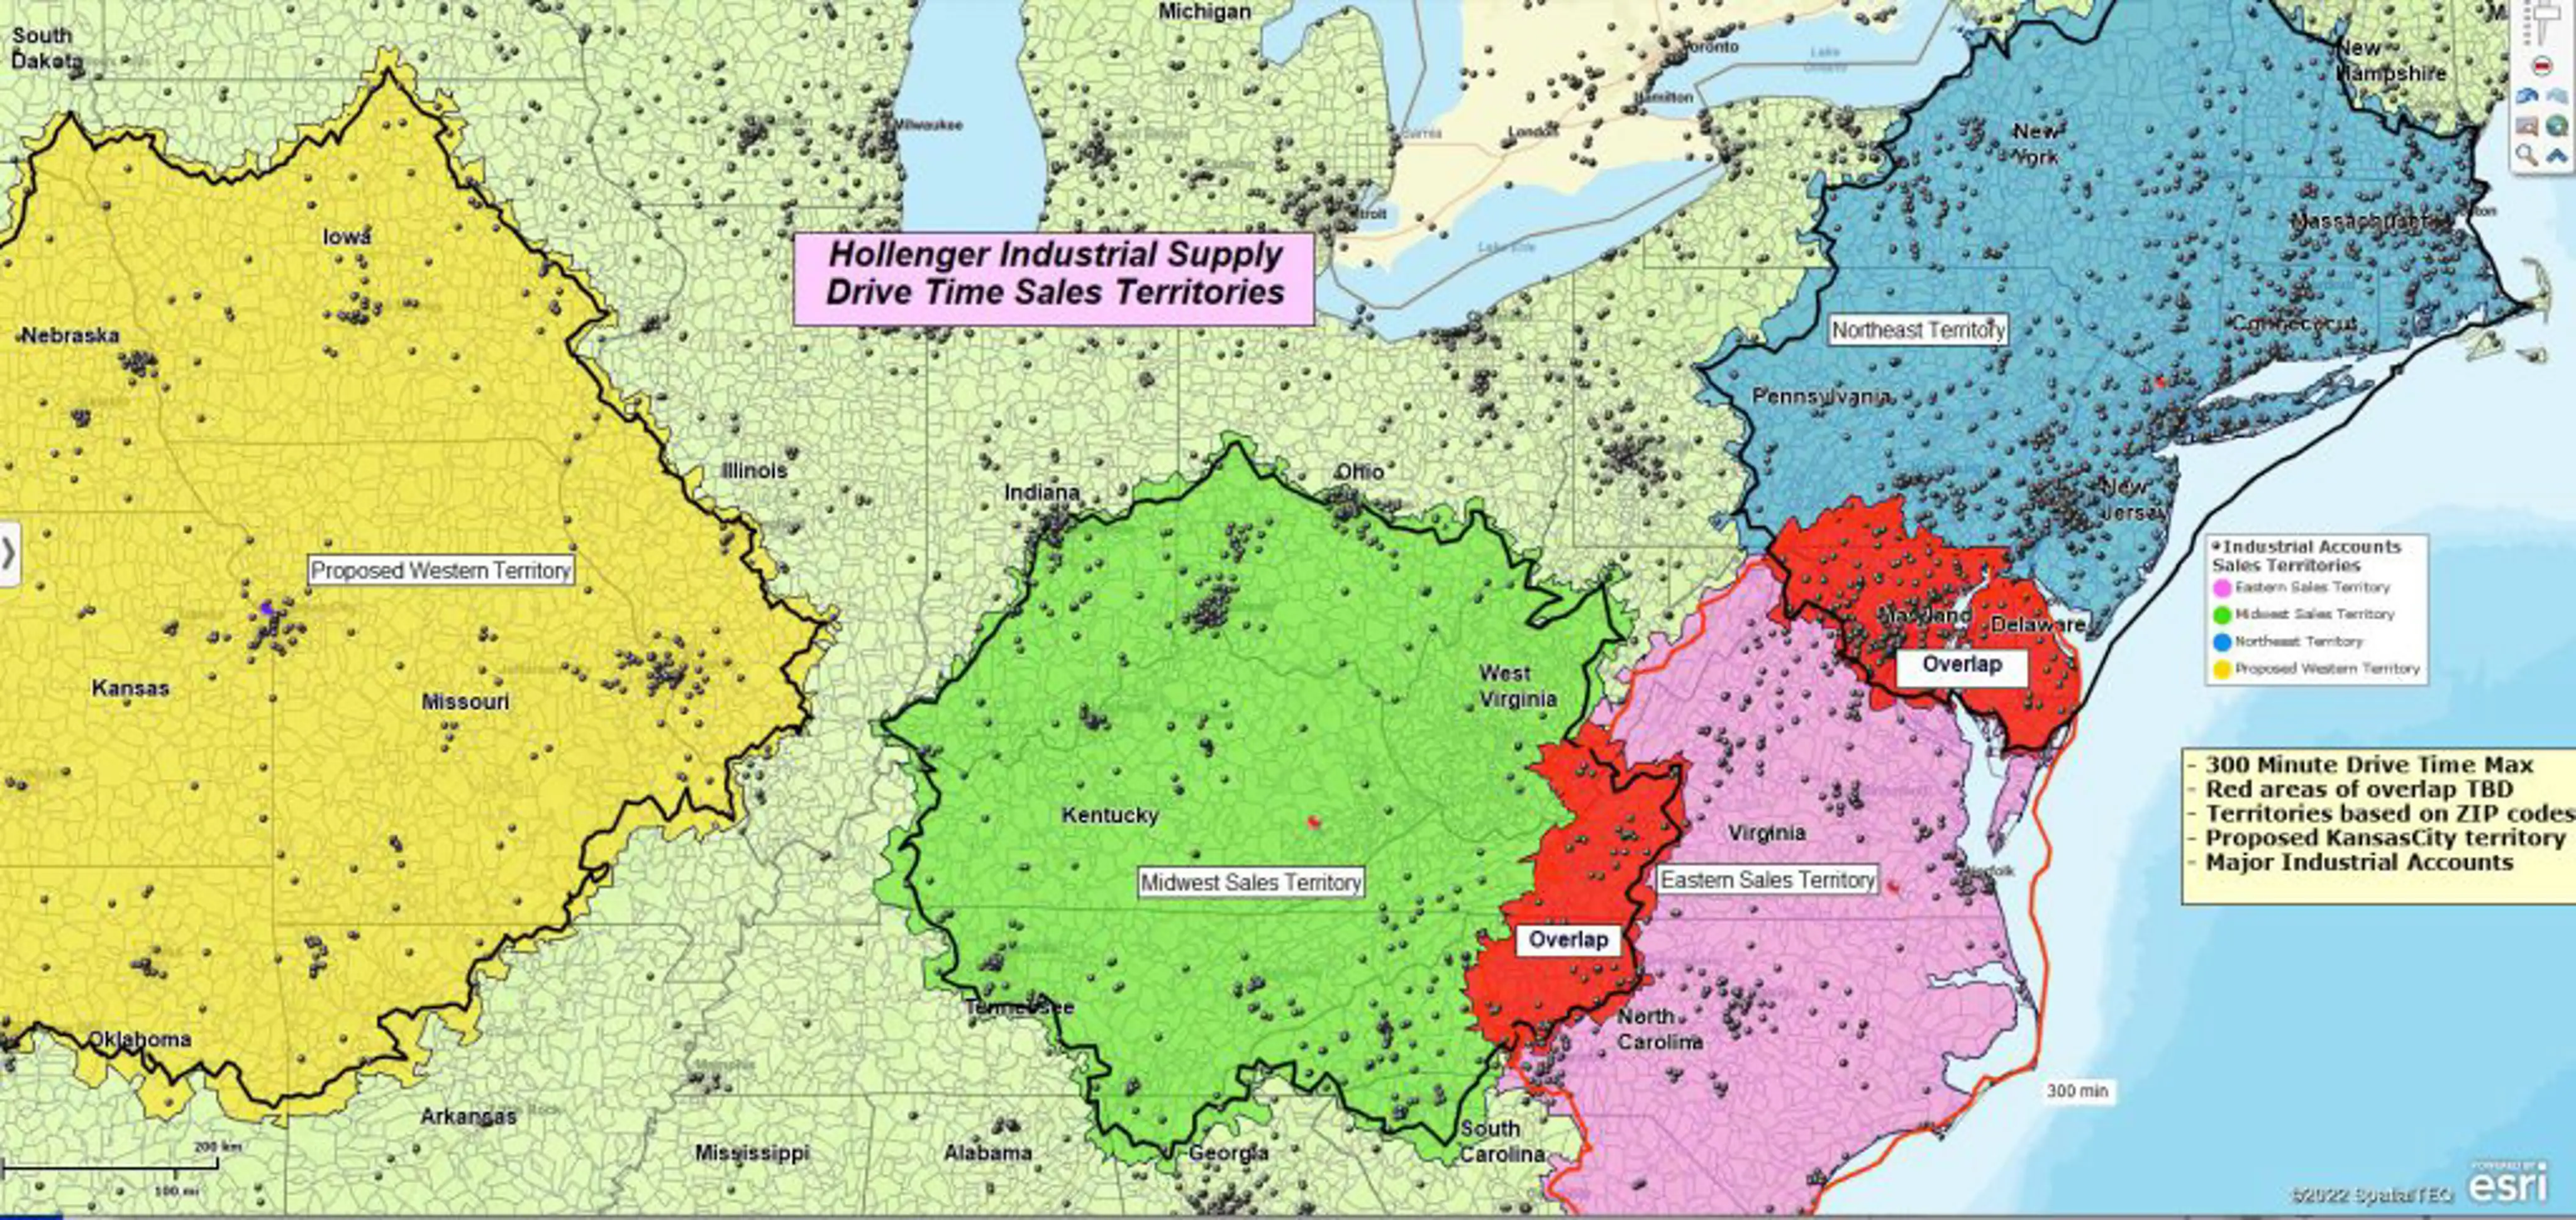
Territory data analysis assigns measurable data results to business processes. In this way, whether your map is for sales, healthcare, or field services, territory maps drive accountability. Shared territory maps help a sales rep understand their goals or a clinician’s limit for new referrals in a week.
Drive time searches could also generate territory polygons. Import a list of home addresses for your sales representatives. Conduct a drive time search from each home location, searching 60 minutes in all directions. This drive time query will establish a jagged polygon representing a drive time of one hour along every possible road connection. Next, use this polygon to select your ZIP codes list for territory creation. Now your salespeople understand how proximity to their home relates to their territory size. This approach is perfect for controlling travel expenses and minimizing sales overlap.
Your company could also compile preassigned lists of ZIP codes (or counties, states, or even Census tracts), with a corresponding territory naming column, and directly import such a data sheet into the map to create color-shaded territories automatically. Even ex-Microsoft MapPoint users can convert their territories to new business mapping software by exporting to Excel and importing it into MapBusinessOnline.
Once created and imported, territory maps can be easily adjusted. After all, nothing stays the same for long. Maintenance is as easy as a mouse click. You can click on ZIP codes on a map and add or subtract them from the target territory.
Millions of organizations apply territory mapping software to define areas of responsibility and measure progress against goals and objectives. Business mapping software, supporting territory management, is so affordable and quickly applied today that companies without sales territory maps often go quietly out of business, never realizing what went wrong.


