Jason was out on vacation last week, and I found myself once more in the hot seat answering phones and chats. As usual, I came away thinking about new blogs I could write.
One of the challenges in providing map instructions to new users, especially users new to business maps in general, is giving them a basic map to work with that satisfies their immediate requirements. Later a user can try more complex mapping options.
In the past, I’ve tried to find the most basic map example and write about it. But within a month or so, I run across a new map user with new requirements for a still pretty basic business map. So, below are four examples of basic maps a first-time user could try:
A Basic Map View Around a Central Point or ZIP Code
Not every new map user has a location dataset to import. Customer or patient datasets are a great place to start, but if your mapping doesn’t involve a dataset, try starting with your current address or ZIP code.
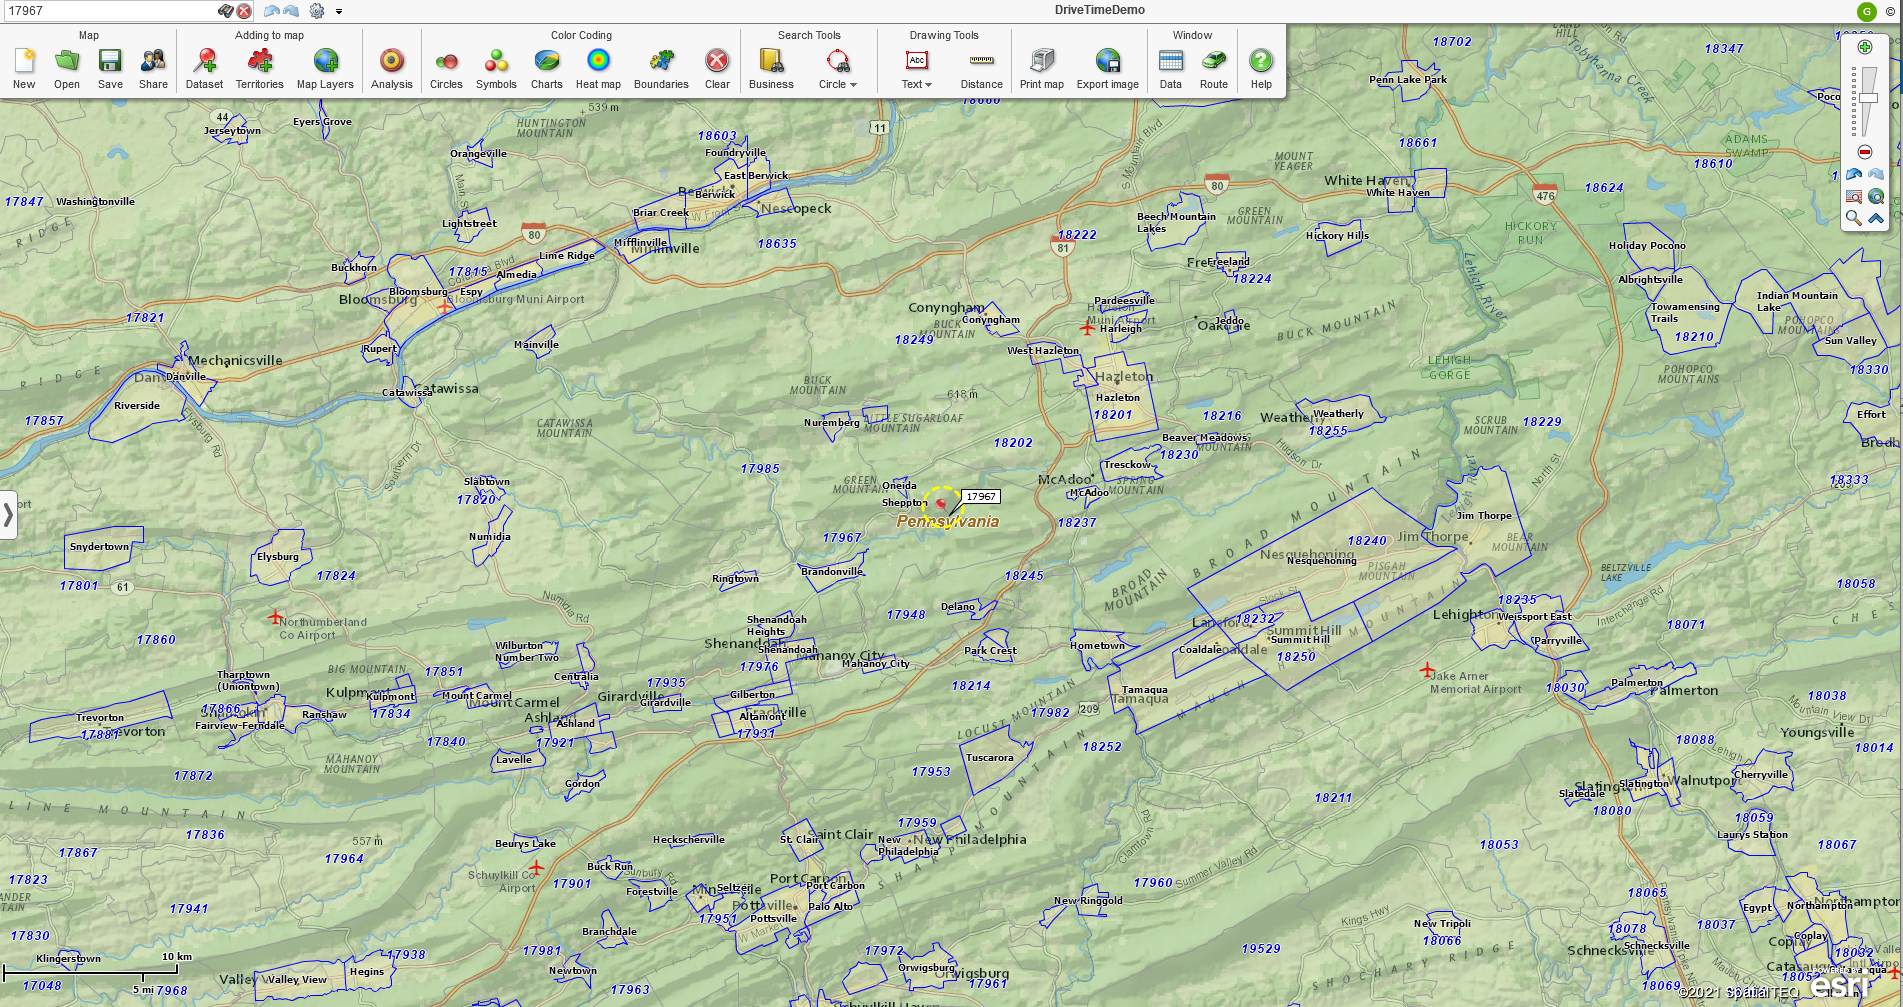
Put your address [Street, City, State Abbreviation, ZIP] into the Address Bar in the upper left corner of the business mapping application. If all you have is a ZIP code, key that in. Click the Binocular Icon to the right of the Address Bar.
MapBusinessOnline will zoom into your address or ZIP code and place a point on the map with a Mini-toolbar associated with the point present in the map view. Use the Navigation Scrollbar in the upper right of the application to pull back and set an adequate map view around your area of interest.
Next, in Map and Data, turn on the primary map layers you’d like to include in your map view. ZIP codes and States are a great starting point for map layers. You’re going to be upset now because the ZIP code layer blocks your map view of the Street background. No worries.
In Map and Data, hover your cursor over the Map Layer and click the Edit Map Properties gear. Under the General Tab, push the Transparency Scrollbar to the right to adjust the opacity of the ZIP codes. You will also find adjustments for boundary line thickness and color and a Fill check box with color options. These tools provide controls for your map’s look and feel. Learn to love them. Each map layer has identical controls.
Tweak the map to your liking. Consider additional layers in the Add Map Layer button on the Master Toolbar. Add city limits, highways, or even Census Bureau marketing statistical areas (MSA’s) to your map.
Sit back and review your work. Check you spelling. Delete layers and draw objects you don’t need. Keep your map simple and focused on your map’s purpose. Try different map backgrounds or even no map background.
A Basic Map Around a Zip Code with National Geographic Background Map
ZIP code maps come in several different flavors – Read more about ZIP code maps. So, flavor-wise, there are multiple approaches to ZIP code mapping for the new user:
- Use a polygon Search Tool to select a group of ZIP codes and save that selection as a territory or area of interest. This initial group of ZIP codes will be color shaded. You can easily add or remove ZIP codes as required. Read more about map editing.
- Import a list of ZIP codes and color-code MapBusinessOnline’s ZIP5 code layer based on your imported list. Turn off the imported point layer and view the color-shaded ZIPs. You can color-code based on Count or a numeric column in your imported data. Use the Boundaries button on the Master Toolbar’s Color-Code section to color shade ZIP codes based on imported data. For some users, this is all they require from MapBusinessOnline.
- You could leave your imported ZIP code dataset or address dataset on the map and color-code those points you’ve imported using the Color-Code Symbols button on the Master Toolbar. Remember you can always aggregate numeric data from your spreadsheet into the flexible label fields of your data points or map layers (like ZIP code labels.) Read more about labeling here.

ZIP Code Map by Count
An Imported Address Spreadsheet Map
Many first-time MapBusinessOnline users import address spreadsheets that show customers, patients, or resources against an accurate map. MapBusinessOnline provides an easy Dataset import process that begins by clicking the Datasets button in the Adding to Map section of the Master Toolbar.
Follow the import dialogue provided when you click Datasets under Adding to Map or read more about the process.
With data imported into the business map, there are a plethora of things you can do with it:
- Color code the symbols – Read more about color-coding here.
- Aggregate imported numeric data columns into ZIP code, County, State, or Territory labels – Read more about aggregating data.
- Create optimized vehicle routes on your imported data points – Read more about routing.
A Basic Demographic Map
Another common first map requirement is a basic Demographic map. This mapping approach doesn’t necessitate importing user address data. But it will likely include map objects on the map.
MapBusinessOnline lets users access Demographic Data through the Summary Button. Any selected map object includes a mini-toolbar with a Summary Button option. Select the Summary button and choose up to ten Demographic categories to add to the map object for quick and easy export or map placement of a spreadsheet. Read more about quick demographic maps here.
Open the Data Window for a more detailed tabular data view of mal layers including, ZIP codes, counties, city limits, and user-created territories. Use the Choose Columns button to add demographic layers to your map analysis. Read more about Choose Columns here.
Any of the above basic map approaches are an excellent place to start business mapping. The new user, armed with an understanding of how these basic mapping processes work can consider sales territory mapping as a next step.
_______________________________________________
Find out why over 25,000 business users log into www.MapBusinessOnline.com for their business mapping software and advanced sales territory mapping solution. The best replacement for Microsoft MapPoint happens to be the most affordable.
To access MapBusinessOnline, please register and then download the Map App from the website – https://www.mapbusinessonline.com/App-Download.aspx.
After installing the Map App, the MapBusinessOnline launch button will be in the Windows’ Start Menu or Mac Application folder. Find the MapBusinessOnline folder in the Start Menu scrollbar. Click the folder’s dropdown arrow and choose the MapBusinessOnline option.
The Map App includes the Map Viewer app for free non-subscriber map sharing.
Please read customer reviews or review us at Capterra, or g2crowd
Contact: Geoffrey Ives geoffives@spatialteq.com or Jason Henderson jhenderson@spatialteq.com