First-time business mapping users should first relax. You’ve come to the right place. MapBusinessOnline is designed to support non-technical business folks who require a map as part of their job. I’ve included a link to an introductory Web Demo Video of MapBusinessOnline. This video walks you through the fundamental processes you’ll become familiar with using MapBusinessOnline business mapping software.
Typically, users purchase and apply MapBusinessOnline to conduct the following business mapping applications:
- Build a customer map.
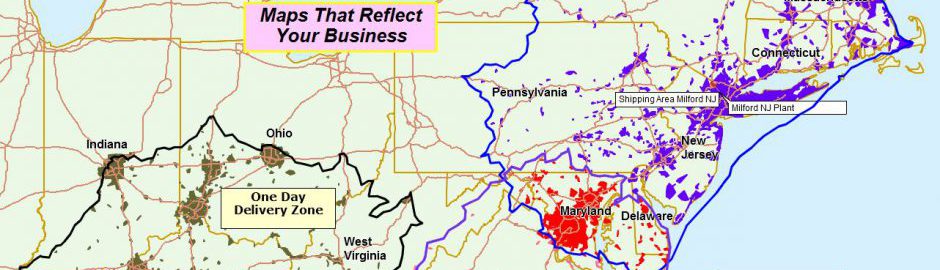
- Create and manage sales territory maps.
- Generate sales planning maps with optimized routing.
- Conduct demographic & geographic-based market analysis.
- Develop & share competitor analysis maps.
- Manage & share business intelligence.
Introducing Map Business Online
I think it is helpful to take a few minutes to explore the business mapping application with no business goal in mind. Once you’ve registered and downloaded the Map App, launch MapBusinessOnline from the MapBusinessOnline Windows Start Menu folder (Application folder on a Mac).
Click the New map button on the left of the Master Toolbar. Select the USA Map template and view the map. The Street background map layer is applied, giving the map user a view of the contiguous USA.

High-Income Earners by County with Nursing Home Locations – A Beautiful Business Map
You can ZOOM in by double-clicking on the map or selecting the zoom tools on the navigation scroll bar tool in the upper right corner of the map view. Here you can scroll in and out using the bar or choose the Magnifying Glass to zoom into a rectangle drawn on the map.
Those Blue Arrows below the Scroll Bar allow you to undo and redo your moves.
Navigation Scrollbar in the Upper Right, Back Arrows Above the Master Toolbar.
Zoom in and out to get familiar with the map’s look and feel. You’ll notice a grey box hovering over the map like a massive UFO. That UFO is Map & Data and presents a Map Layers checkbox list. Note that the Street layer is checked on, which allows you to see the North American street map with states, roads, rivers, and basic land details. Map & Data and presents a Map Layers checkbox list. Note that the Street layer is checked on, which allows you to see the North American street map with states, roads, rivers, and basic land details. Zoom in and out to get familiar with the map’s look and feel.
You can click the USA icon in the Navigation Scroll Bar tool to zoom back to the entire USA view.
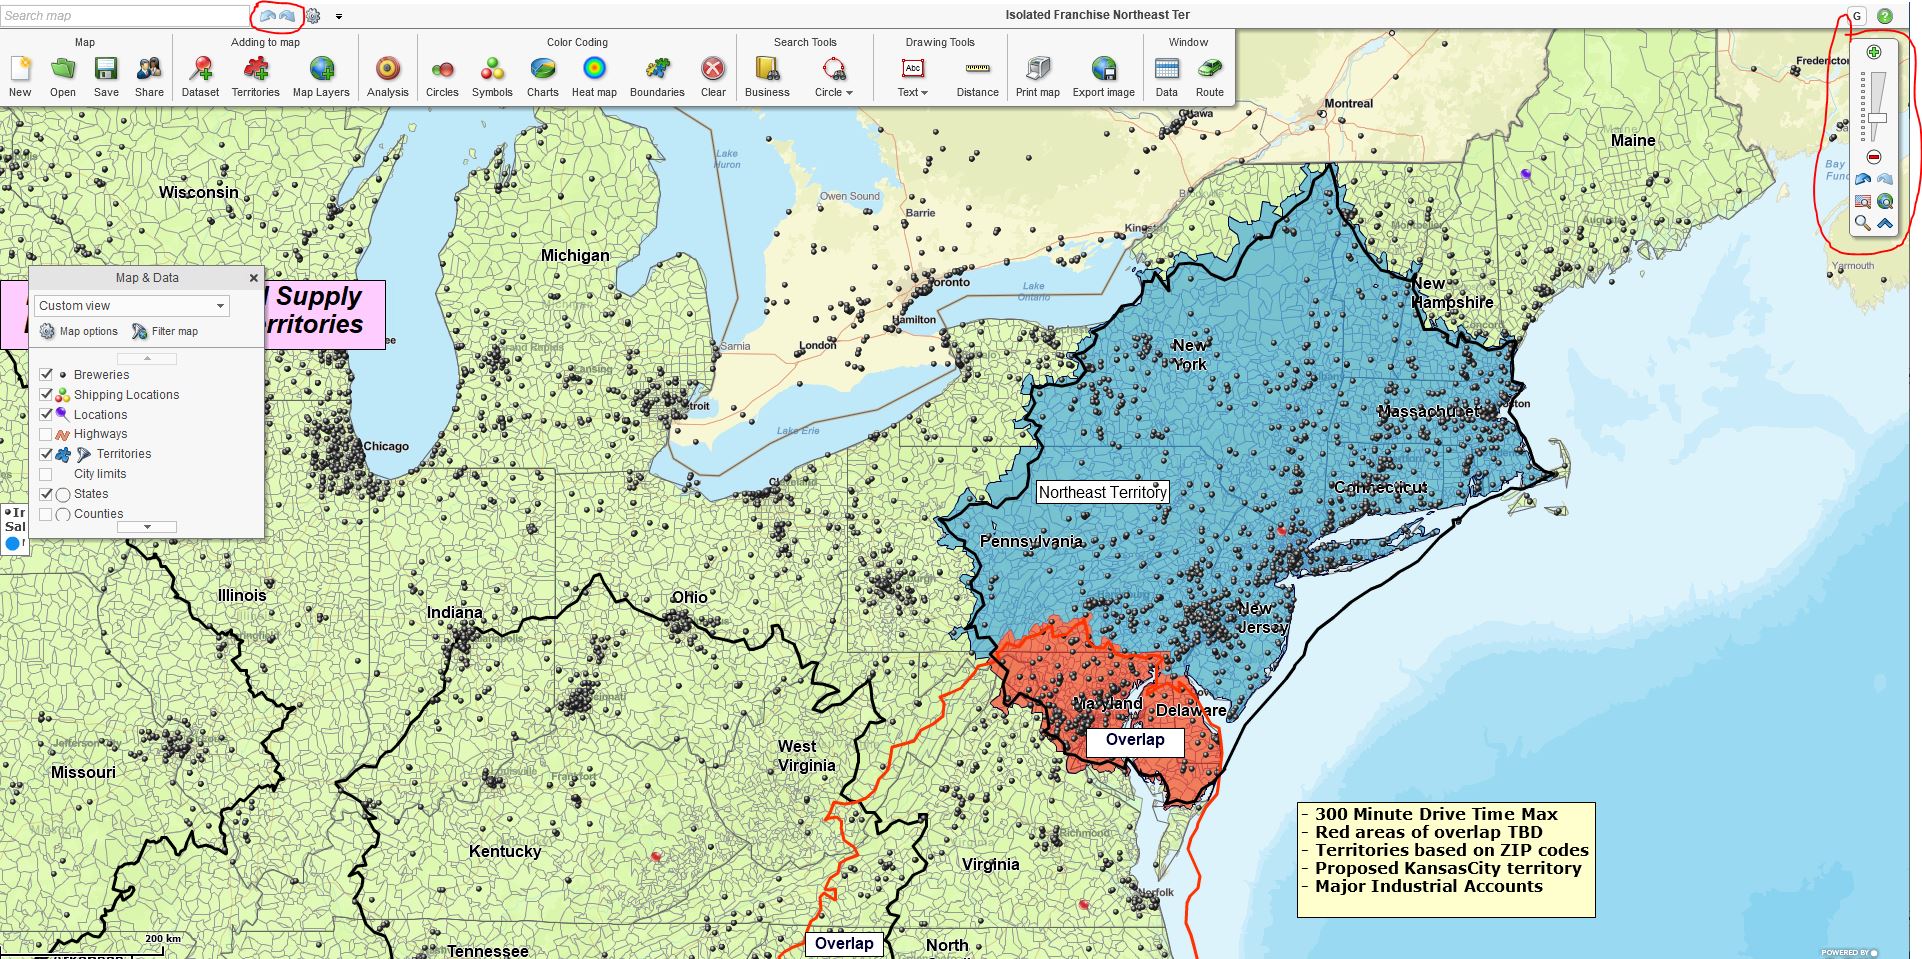
Using the Map and Data Box
Now back in Map & Data, check on the ZIP code layer. Go ahead. Don’t be shy. You’ll see the ZIP codes populate all across the USA. Now you can’t see the Street layer. Settle down easy slim.
In Map & Data, hover your cursor over the ZIP code layer. Click Edit Map Layer Properties. Once inside this editing tool, you will see the horizontal scroll bar to control the map layer’s transparency. Move that control bar to the right, and you’ll see the Street layer come shining through. You also know that you can adjust the fill color, the border color, and the thickness. There are label controls here, too – note the sideways tabs for General and Label.
Map & Data is your friend. Use it to control your maps’ look and feel. Keep in mind that the controls you’re using to adjust the look and feel of the ZIP code layer work precisely the same for the County, City-limit, State, Census, and Territory layers.
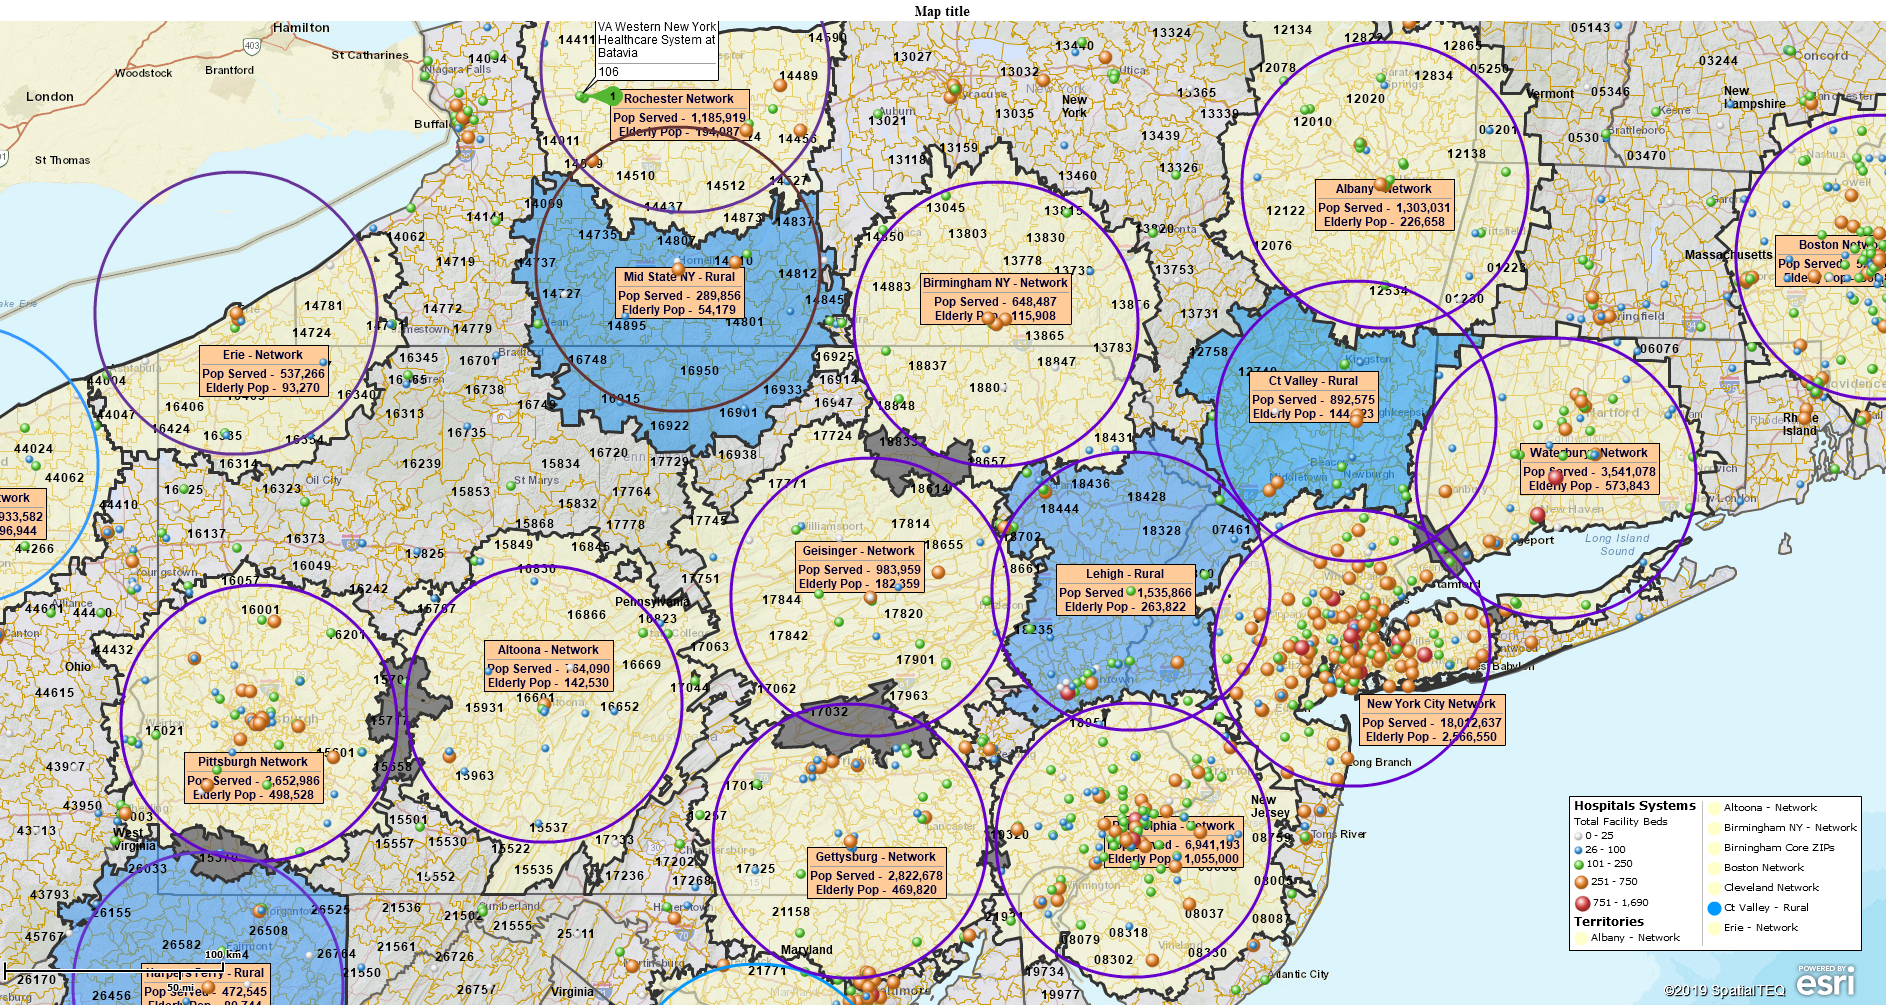
Health Care Insurance Network Map with a Unique Look and Feel
Also, use Map & Data to set up your ZIP code formatting. This will impact every map you make moving forward. Go to the Map & Data Map Options, click the ZIP code tab and select USPS ZIP Codes with Fillers. You only have to do this once.
In the upper left-hand corner of the Map is the Address Bar or Search Map box. Type in your home address: 19 Norwood Ave, Rockport, MA, 01966. Be sure to include the commas.
This places a point on the map. The point placement dialogue will ask questions about creating or adding to a dataset. MapBusinessOnline always wants to add plotted points to a dataset. This is so that your map stays organized. ‘Organazized,’ as Robert Deniro says in his Taxi Driver dialogue with Cybil Shepard.
Ultimately, MapBusinessOnline sets up the easy importation of address datasets. With the Standard subscription, you can import up to 50,000 location records per map. Try a sample dataset. Here are the importing Excel spreadsheet directions located in the Help documentation.
Remember:
- Separate columns for each address component: Address | City | State | ZIP code. Don’t try to import a dataset with all the address information stuffed into one column.
- Use header columns in your spreadsheet. MapBusinessOnline will accept the first row of data as the header, but regular headings on columns are more effective.
- No weird characters and random spaces in your data. Keep your data free of bizarre stuff. Do not include extra text in your spreadsheet.
With your location data plotted on the map, you’ll be able to color-code points or create thematic maps by ZIP code using your imported data. Read more about ZIP codes:
- A Word About ZIP Codes – A ZIP Code primer. Learn about Point vs. Boundary ZIP codes.
- Color-coding ZIP codes.
- Color-coding your location data.
Sales territory mapping and customer mapping are two primary applications of MapBusinessOnline. You’ll find help docs and Blog articles to help you with essential sales territory management.
You can create territories using the Search Tools from the master toolbar or import your territories as an Excel Spreadsheet. Either way, you’ll be viewing and sharing your sales territories in no time. In your territory or location data imports, you can include sales data by address or any other relevant data to add to your analysis. The Data Window view lets you consider any associated data and adjust your sales territory visualization to reflect those critical business elements.
Here are a few more suggested articles relating to sales territory mapping for first-time users:
- Six wicked easy ways to create sales territories.
- Six crucial elements of sales territory mapping.
- Capture and visualize data using sales territory mapping. Get familiar with MapBusinessOnline before jumping into this article.
Adding demographic data to your sales territory analysis can illuminate market trends and sales patterns. Many can do just that. This, of course, depends on whether or not you can connect demographic data with your business’s unique sales patterns. Read more about using demographic data here.
Lastly, it would be best if you optimized your map visualizations. Make your map sing to your map audience. You have already explored map and data but consider the many other map variables that can impact how well your map communicates its intended message to your map viewers.
- Optimizing your map visualization.
- Tips on setting up addressing in imported data.
- Thematic mapping options using MapBusinessOnline.
So, go forth and multiply. Or at least create some well-thought-out business maps using MapBusinessOnline.
_______________________________________________
Discover why over 25,000 business users log into www.MapBusinessOnline.com for their business mapping software and advanced sales territory mapping solution. The best replacement for Microsoft MapPoint happens to be the most affordable.
To access MapBusinessOnline, please register and download the Map App from the website – https://www.mapbusinessonline.com/App-Download.aspx.
After installing the Map App, the MapBusinessOnline launch button will be in the Windows Start Menu or Mac Application folder. Find the MapBusinessOnline folder in the Start Menu scrollbar. Click the folder’s dropdown arrow and choose the MapBusinessOnline option.
The Map App includes the Map Viewer app for free non-subscriber map sharing.
Please read customer reviews or review us at Capterra or g2crowd.
Contact: Geoffrey Ives at geoffives@spatialteq.com or Jason Henderson at jhenderson@spatialteq.com.